Installing Broken Inwales
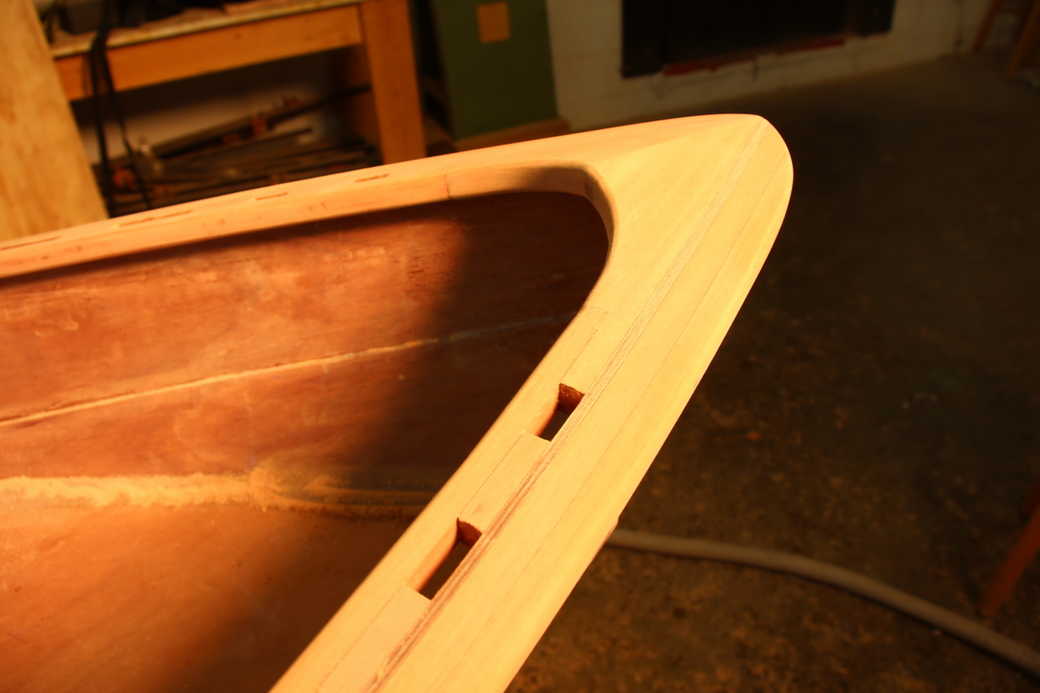
Nothing does more to accent the elegant sweep of a traditional boat's sheerline than a nicely proportioned rail and many builders are inspired to customise their boats with ‘broken’ or ‘scuppered’ inwales. These are longitudinal rails glued to the inside upper edge of a boat, with lots of little wooden blocks separating the rail from the plywood. The spacer blocks mimic the tops of the steam-bent frames in traditionally-built boats.
Some of our boat kits have inwales included as standard; on others they are available as an option or can be fitted as a customisation by the builder.
Although they are mainly decorative, broken inwales do have some practical advantages: they create handy lashing points along the whole length of the boat and the gaps, or scuppers, allow all the water to drain out when you tip the boat over on the beach. In a canoe, inwales give you somewhere to attach seats and thwarts. They also add a bit more stiffness to the hull.
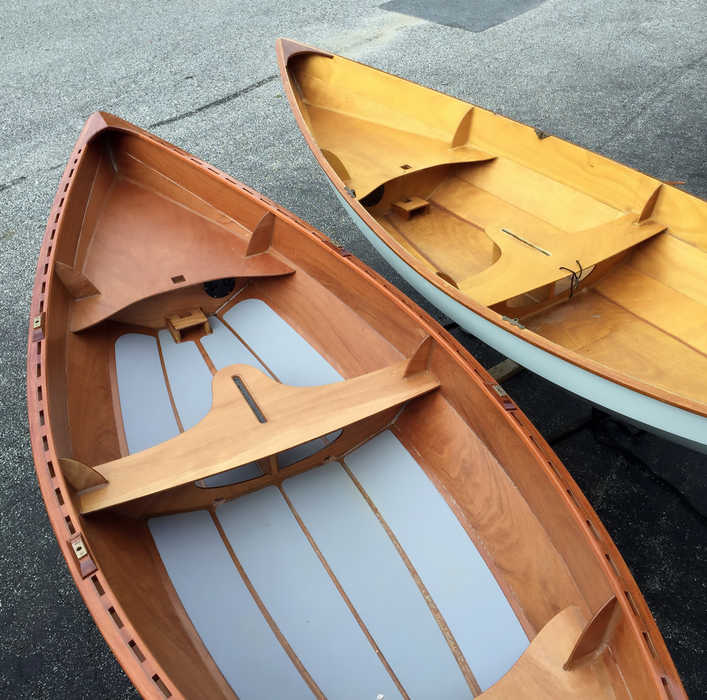
Here we have two Skerries, one with broken inwales and one standard version without inwales. The broken inwales make the Skerry on the left look sophisticated and craftsmanlike. It's shipshape and looks right.
The reason we don't include broken inwales in every boat is that they require some non-trivial joinery and are quite time-consuming to install. Sanding and finishing around all the little spacer blocks takes even longer. Installing broken inwales might not be a task suited to first-time boatbuilders.
Adding broken inwales to a boat will require modifications to breasthooks, frames, quarter knees and other structures. The side-mount rowlock sockets that come with most of our rowing boat kits will have to be replaced with top-mount sockets mounted on riser blocks.
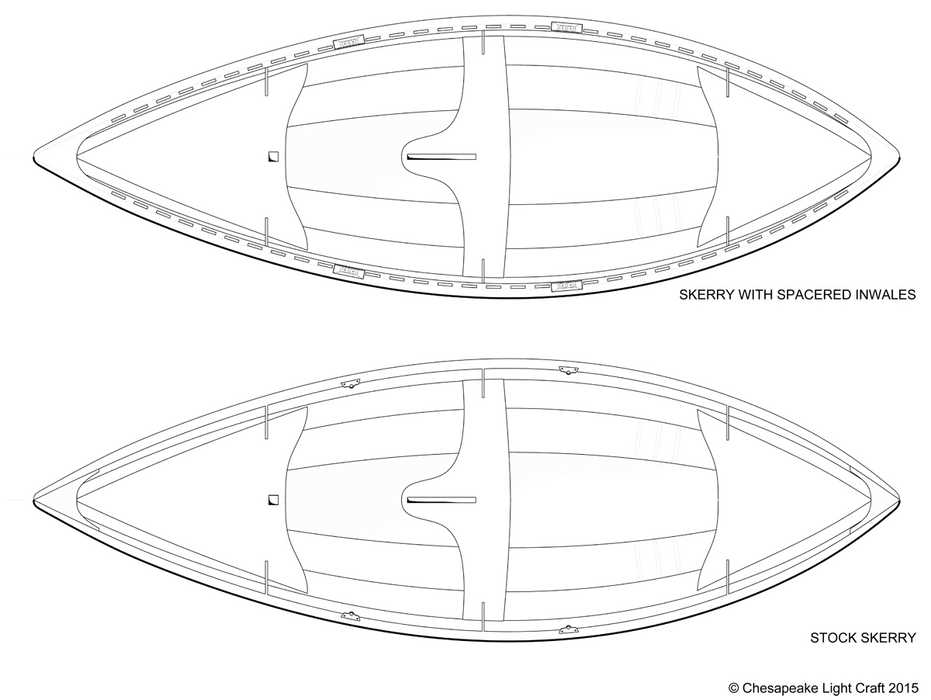
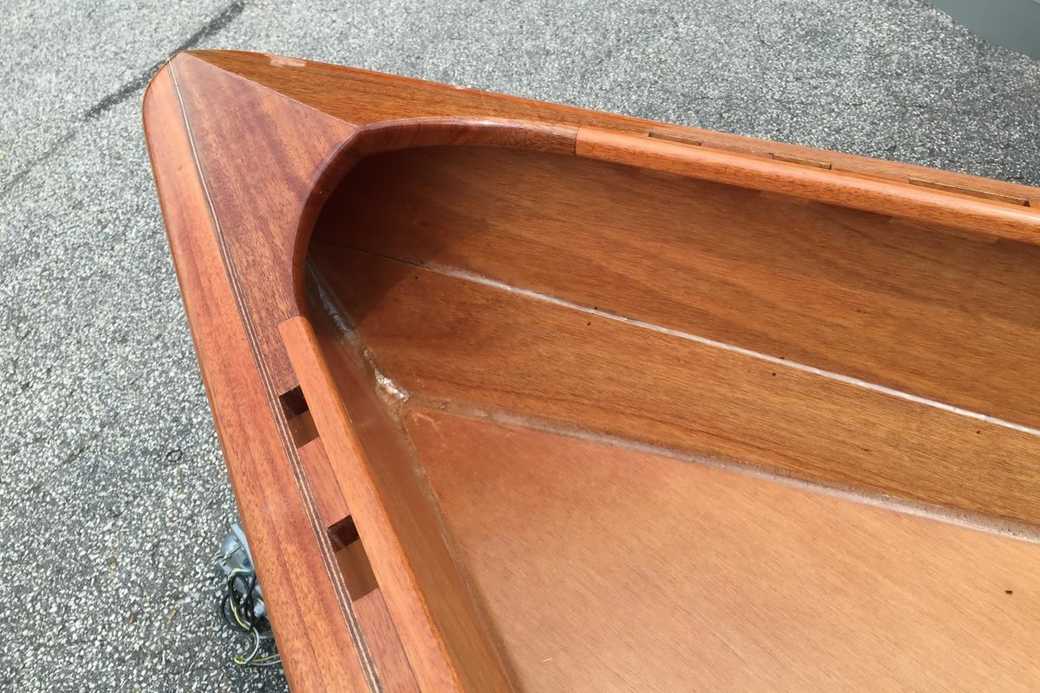
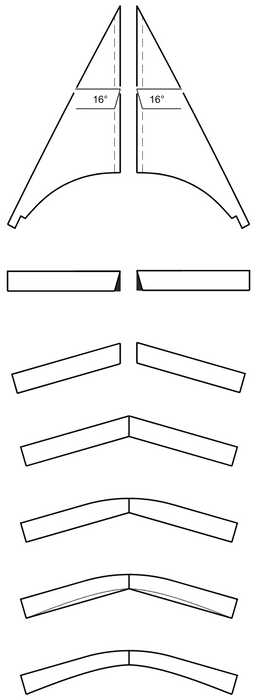
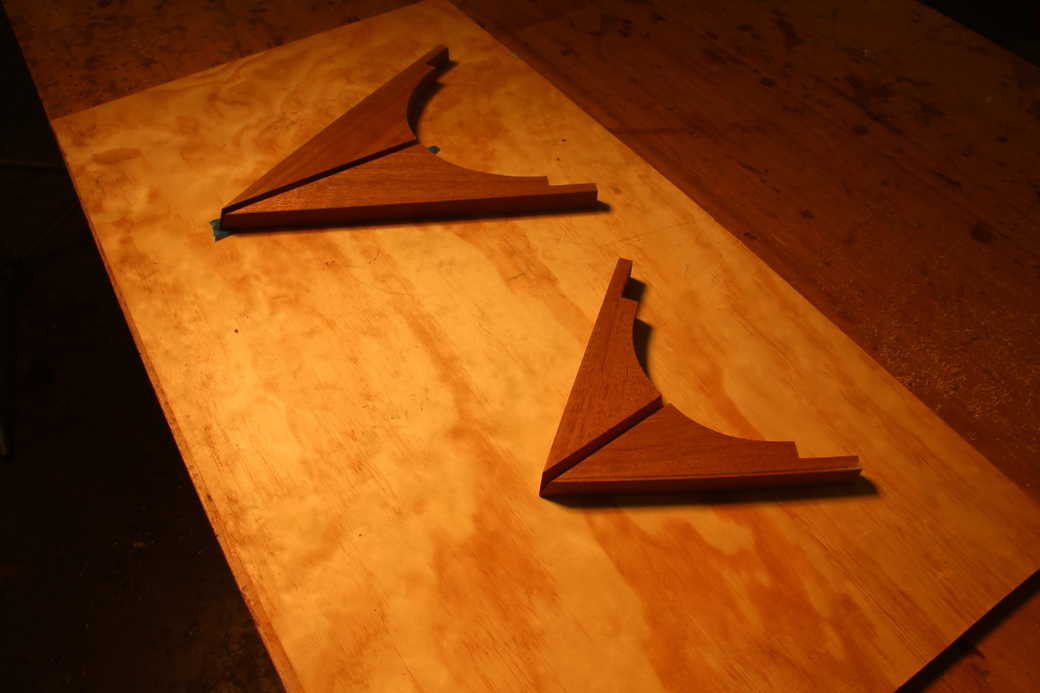
The Skerry's standard breasthooks are made of a single piece of plywood, bevelled to fit between the sides of the boat. It goes straight across the boat, as seen in the first cross-section in the diagram below.
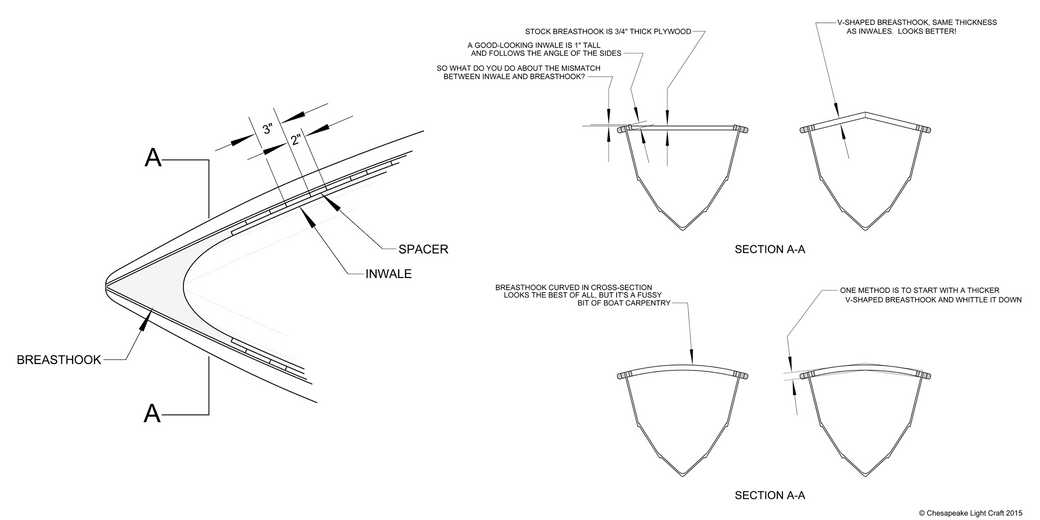
The inwales are glued to the inside of the top strake and thus angled to match the boat's flared sides. Because they aren't at the same angle as the breasthook, they can't terminate neatly. One solution is to make a v-shaped breasthook from two pieces of wood at the same thickness as the inwales. This is shown in the diagram's second cross-section and is the method we will show in the step-by-step guide below.
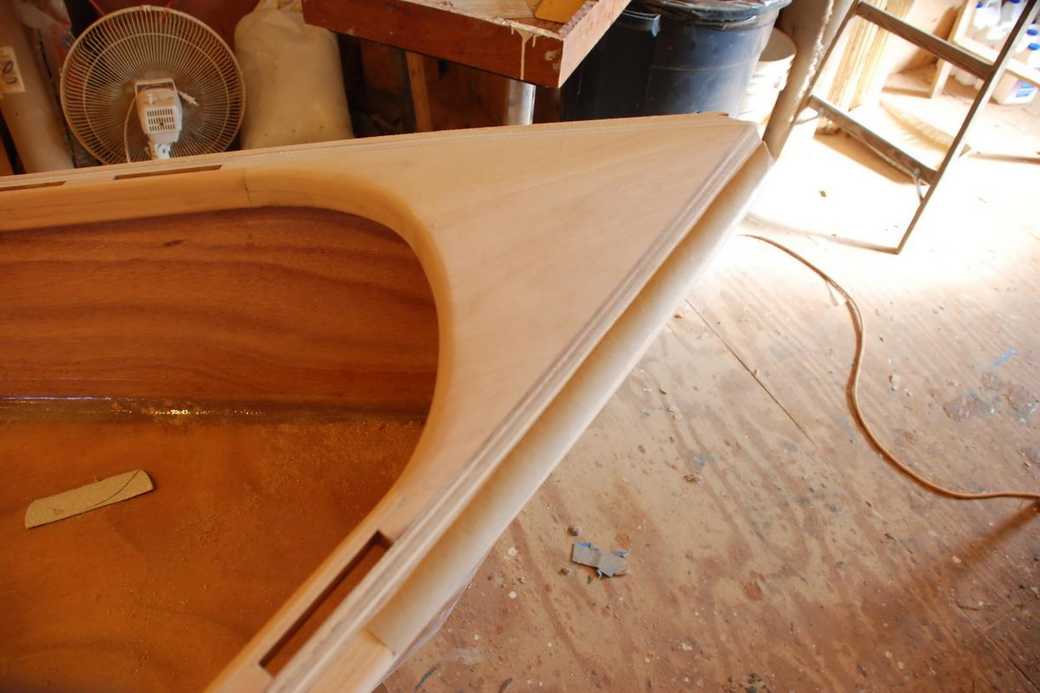
A fancier solution is to make a breasthook that arches like a violin top, as in the third and fourth cross-sections in the diagram. This can be done either by laminating veneers or layers of plywood into an arc or by starting with a v-shaped solid wood breasthook and rounding it over.
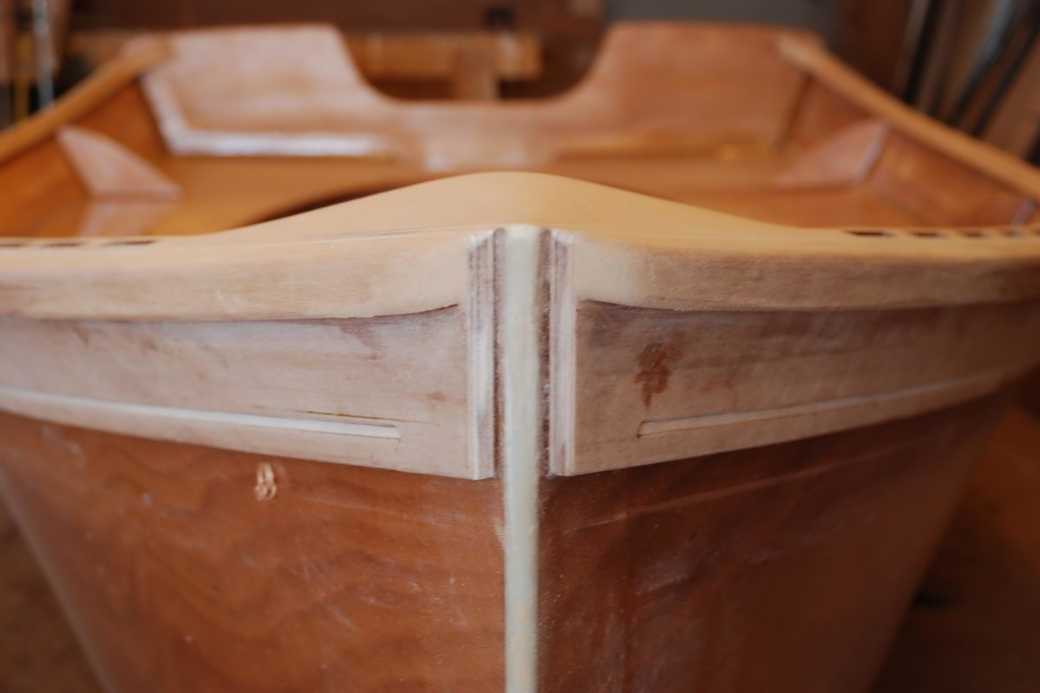
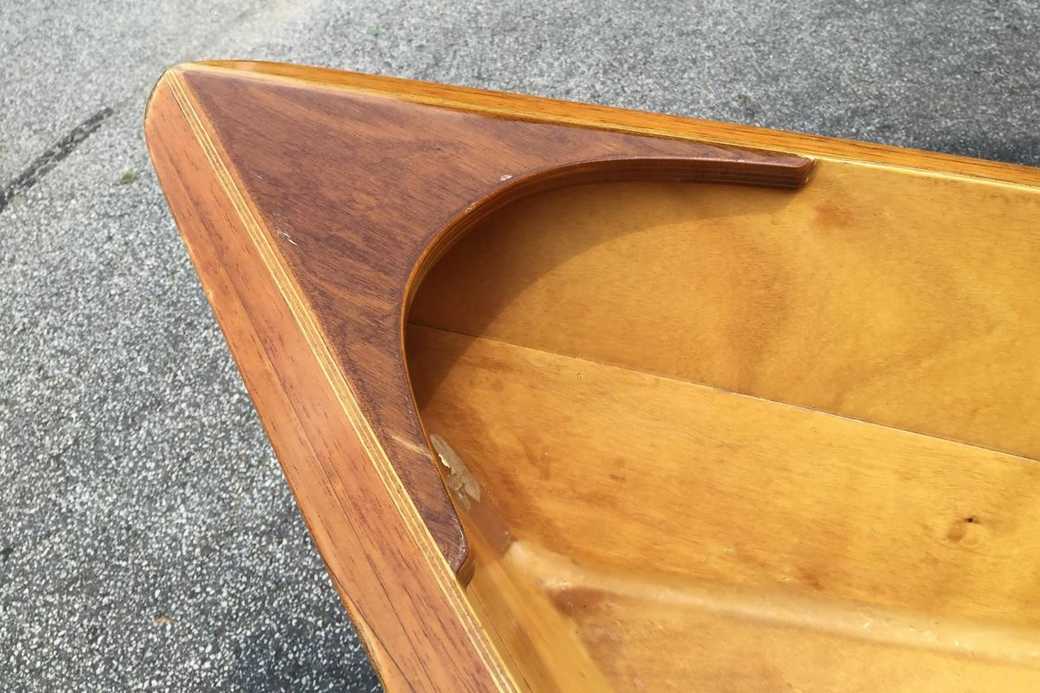
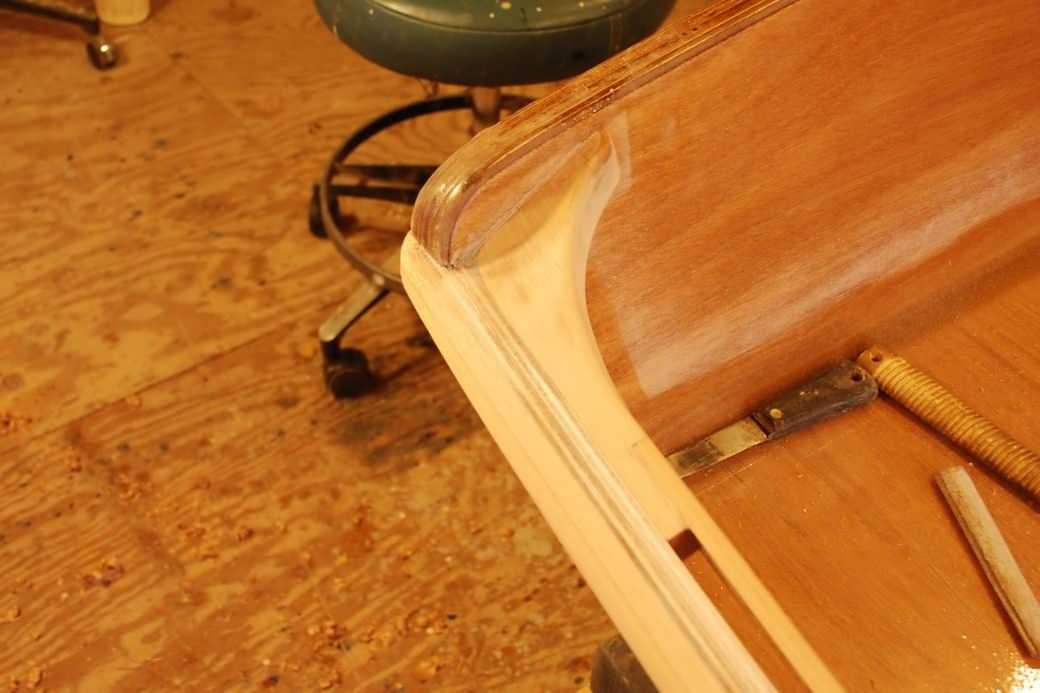
The Peeler Skiff, which includes broken inwales as standard in the kit, has a solid-wood breasthook that is rounded to a gentle curve, as you can see in this head-on view. This requires the breasthook to be made of pieces of wood that are considerably thicker than the inwales, because much of it will be lost when you carve it to the right shape.
The Skerry is a double-ender, so there is a breasthook at either end. Boats with transom sterns, such as this Peeler Skiff, require quarter-knees for the aft terminus of the inwale.
Here's how we install broken inwales on the Skerry, step-by-step.

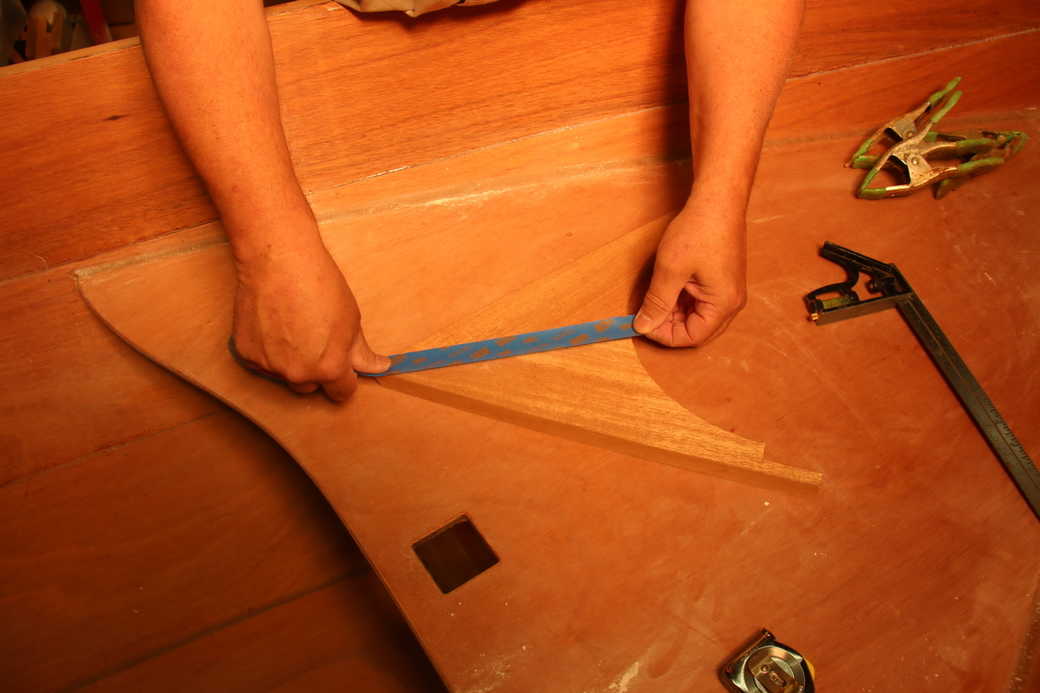
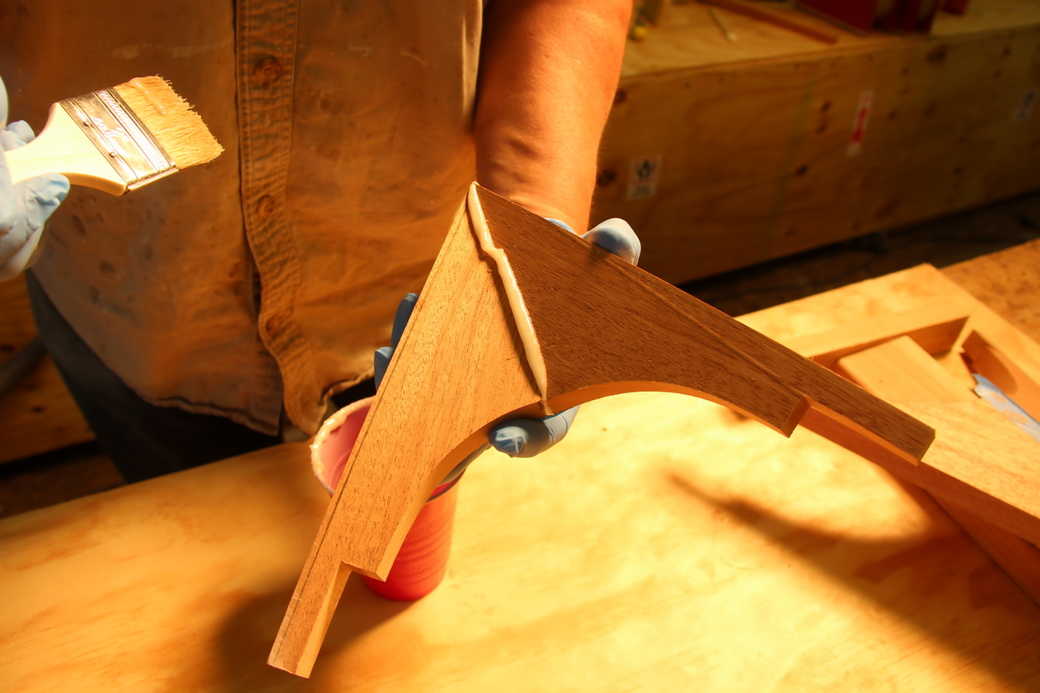
We begin by creating a template on a piece of scrap for the breasthooks at the bow and stern. We want a pleasing curve where the left and right halves meet, so that there will be no awkward kink at the breasthook. Note that the template includes the notches where the inwales will join the breasthook.
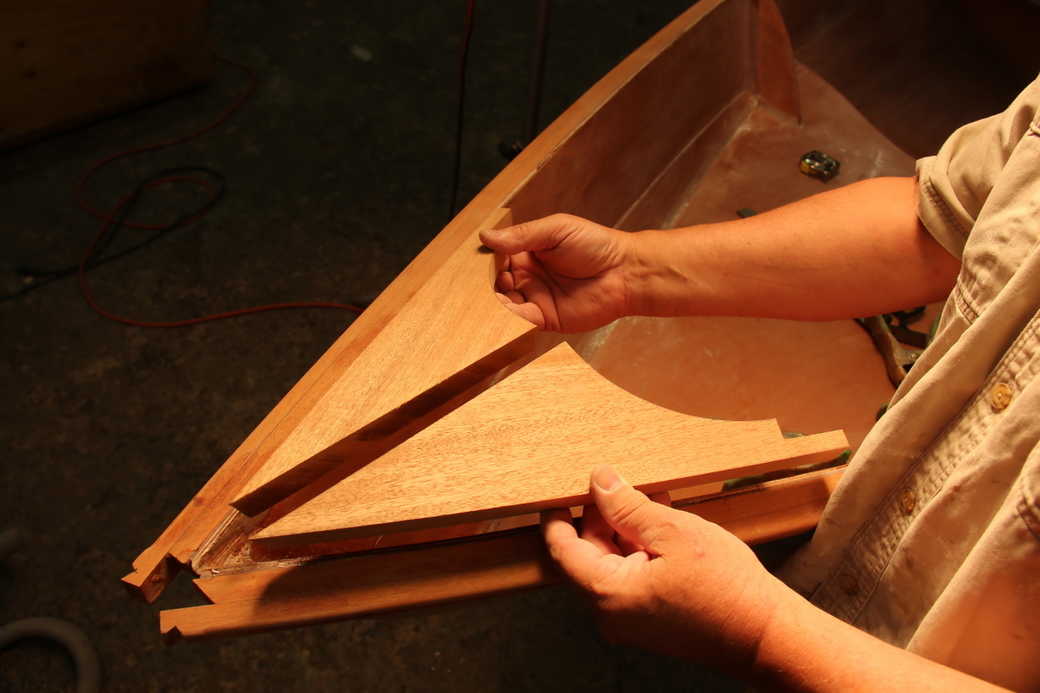
Some careful cutting and fitting yields left and right breasthook halves that join down the centre-line.
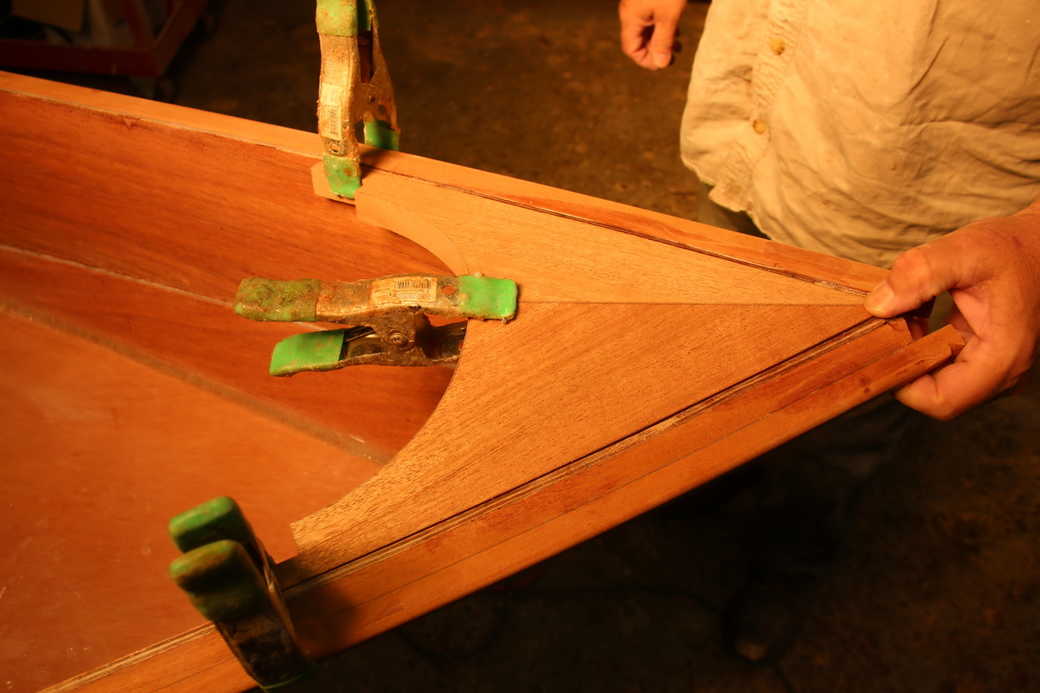
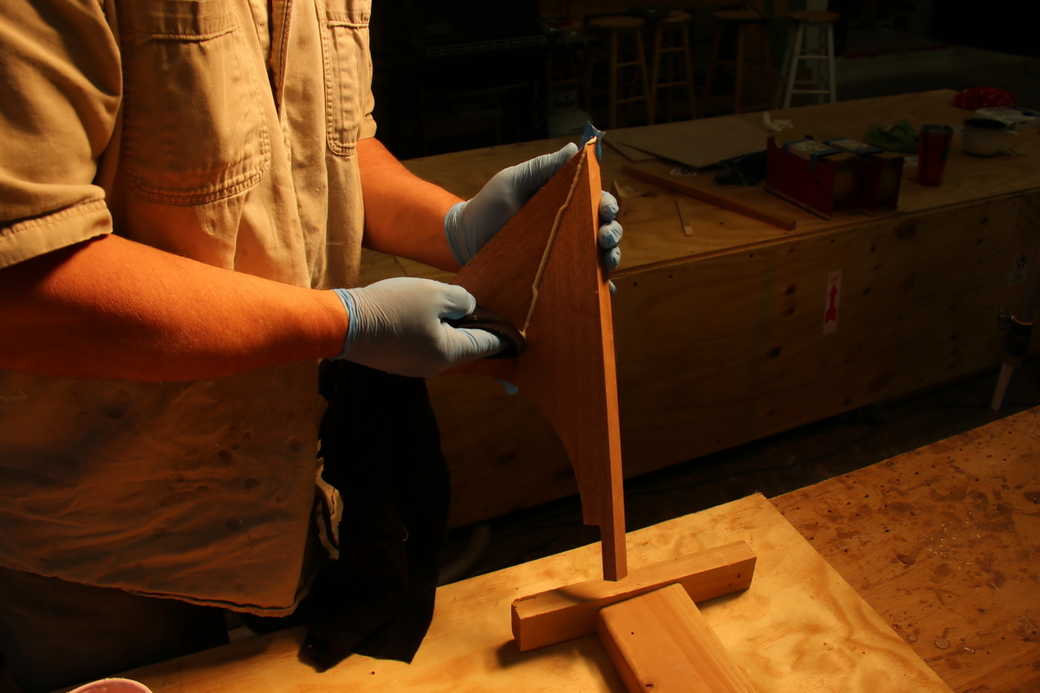
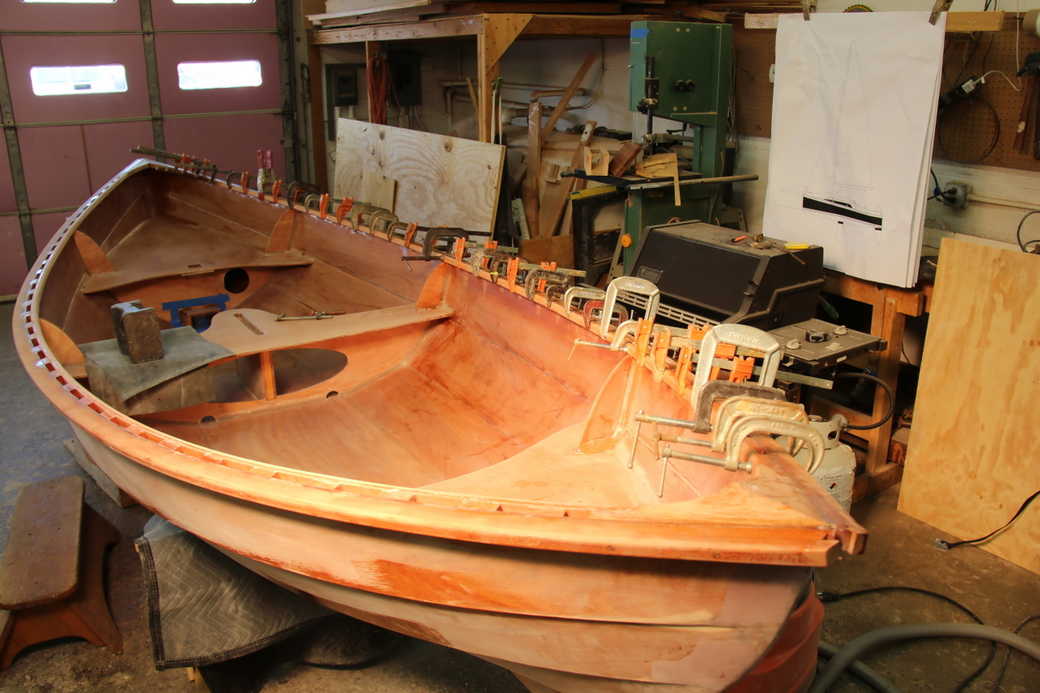
Spring clamps hold the breasthook while you take note of any necessary adjustments. Note that the outwales have already been installed. Wedge the Skerry's standard plywood breasthooks in place temporarily during hull assembly to ensure that your bow and stern are shaped correctly.
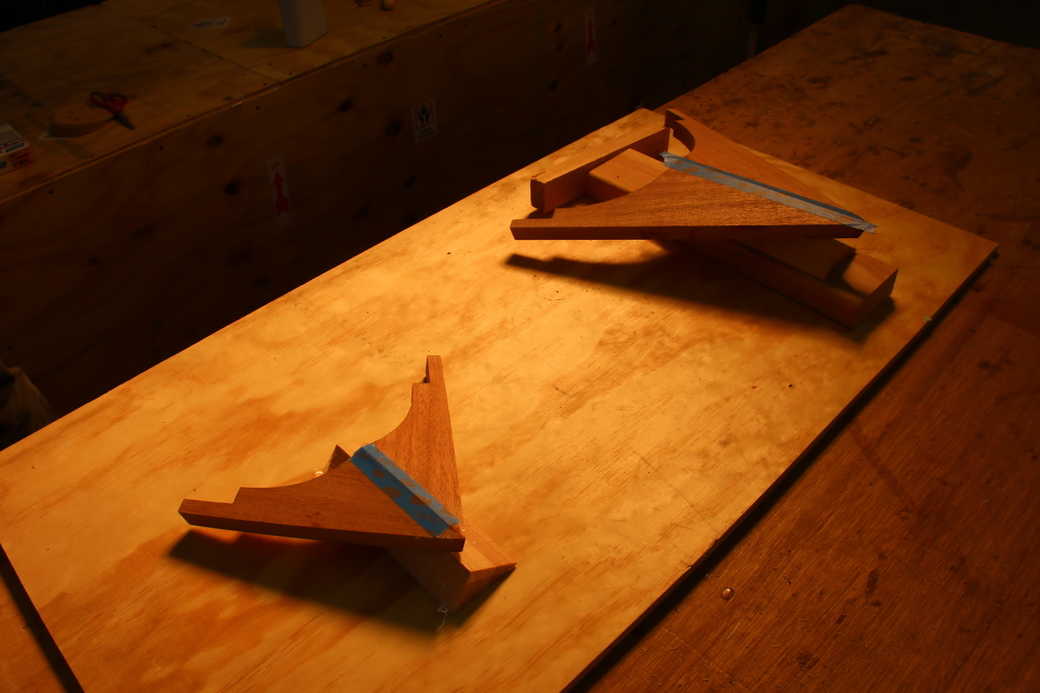
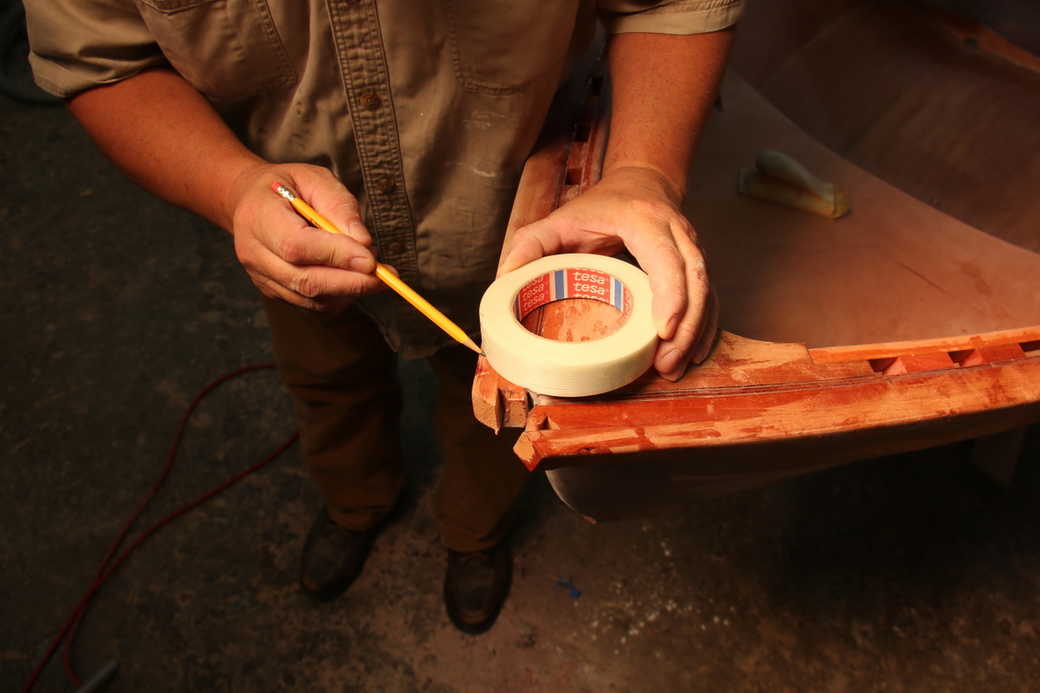
Gluing the breasthooks is very easy. Start by placing a strip of masking tape along the joint on the top surface of the breasthook, making sure the two halves are aligned.
Then flip the taped-together breasthooks over on the workbench. The bevelled centre-line joint opens up when the breasthooks are laid out flat.

Work some thickened epoxy into the centre-line joint.
Squeeze the breasthook joint together.
Clean up the squeeze-out.
Then set the breasthooks down, right-side-up, on supporting blocks. The masking tape holds the joint tight, while the weight of the breasthook ensures good contact while the epoxy cures.
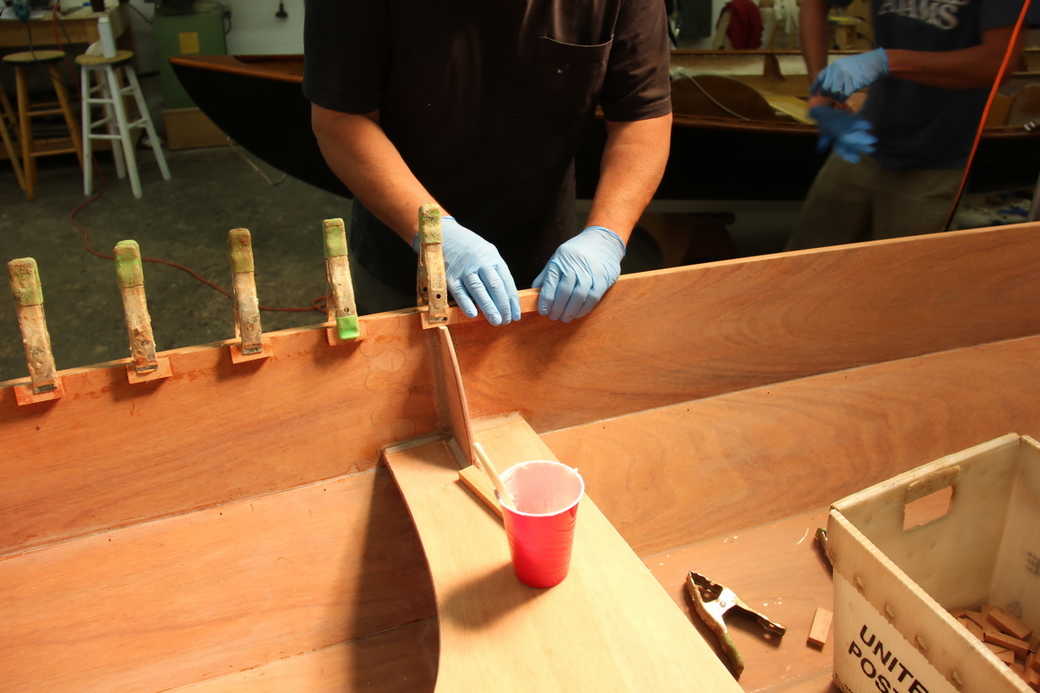
When the epoxy has cured, peel the tape off and you're ready to install the breasthooks in the boat. Brush thickened epoxy onto the mating surfaces and clamp the breasthooks in place.
A few spring clamps should be all that's required for a neat fit. Let the epoxy cure.
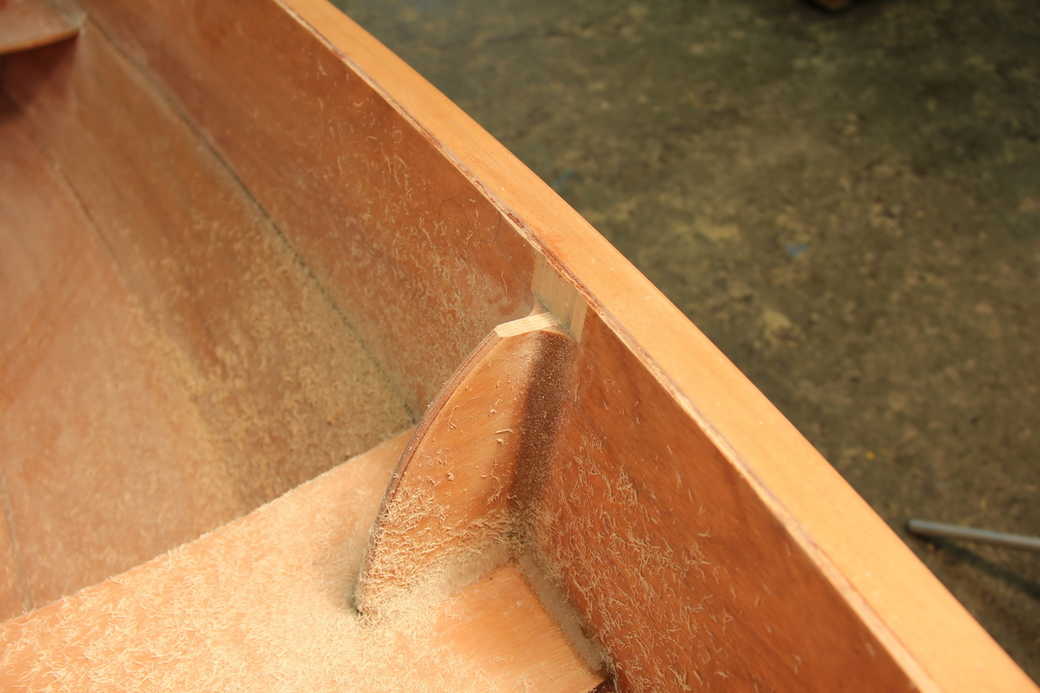
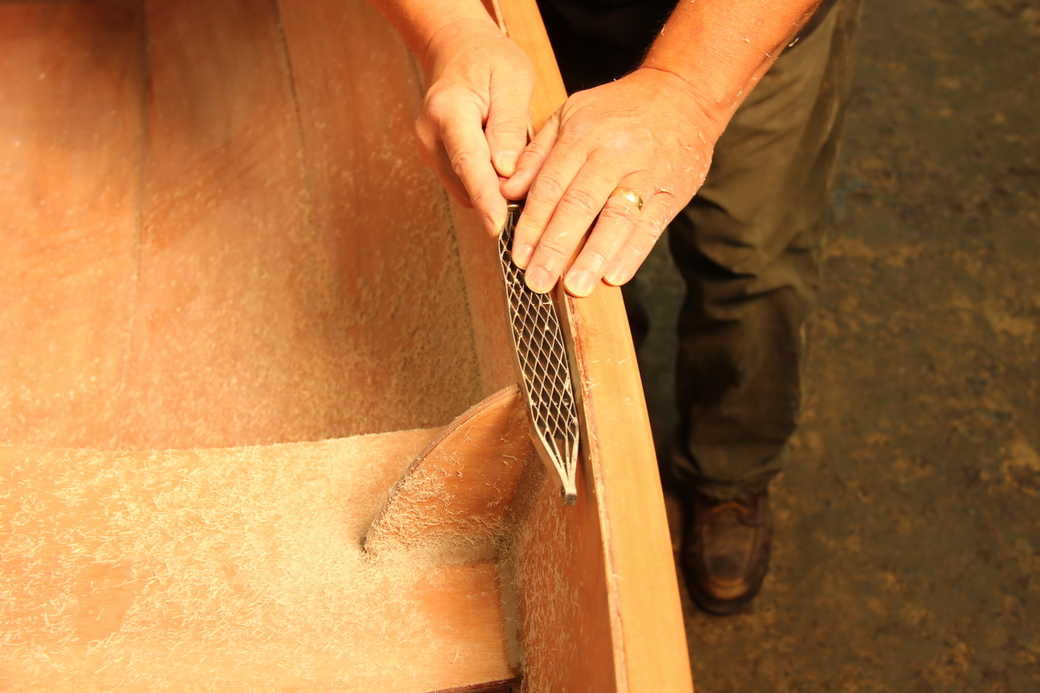
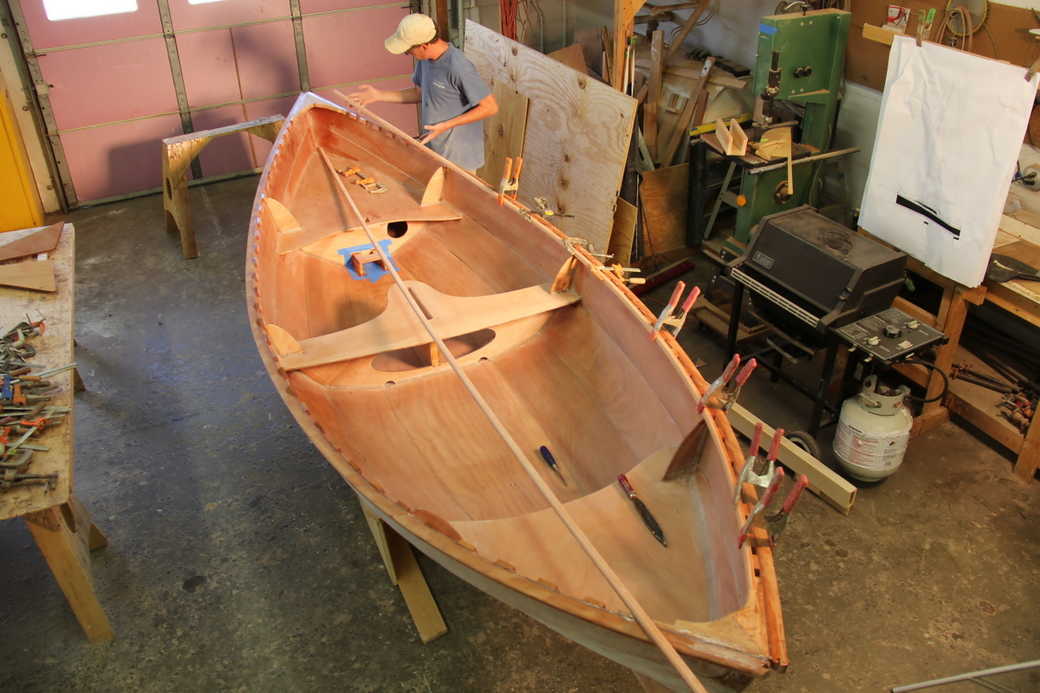
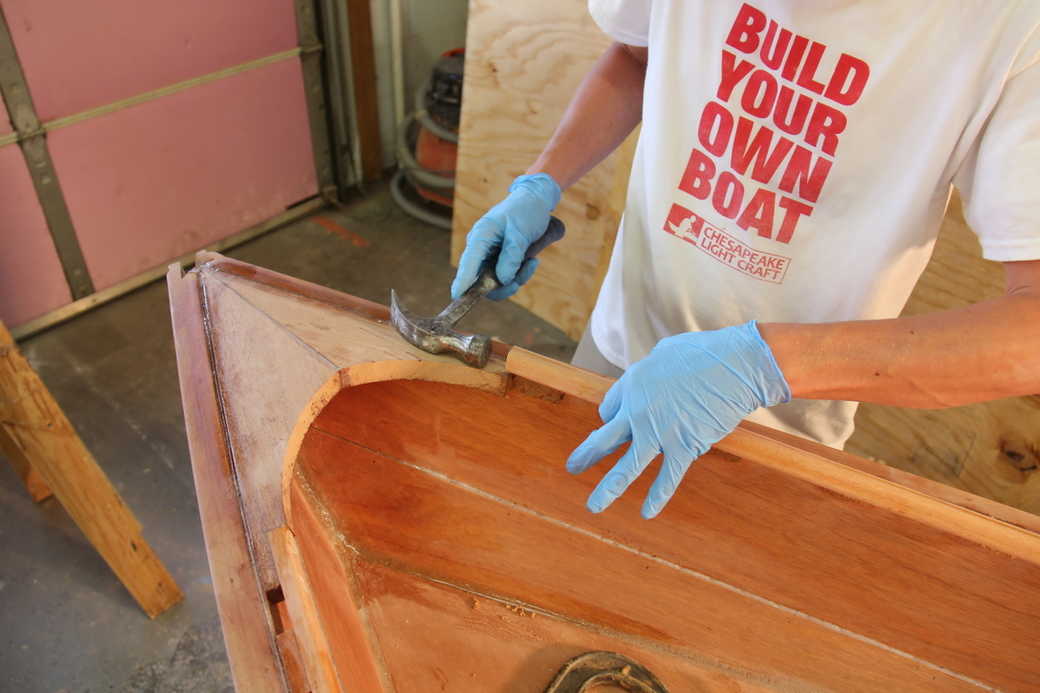
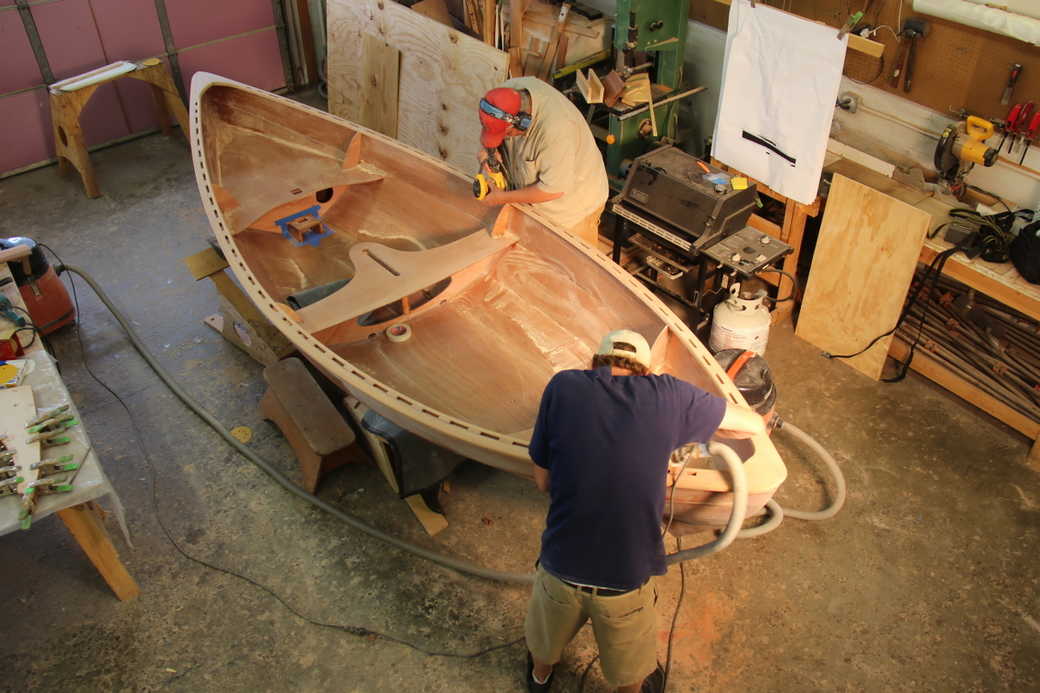
Now we'll make the rest of the boat ready for the inwales. Like most of our boats, the Skerry's structural bulkheads extend right up to the sheer line and will get in the way of the inwales. We need to nip the tops off the bulkheads just enough to make room for the inwales. You can do this with a small saw and a sharp rasp or, if you have steady hands, a router.
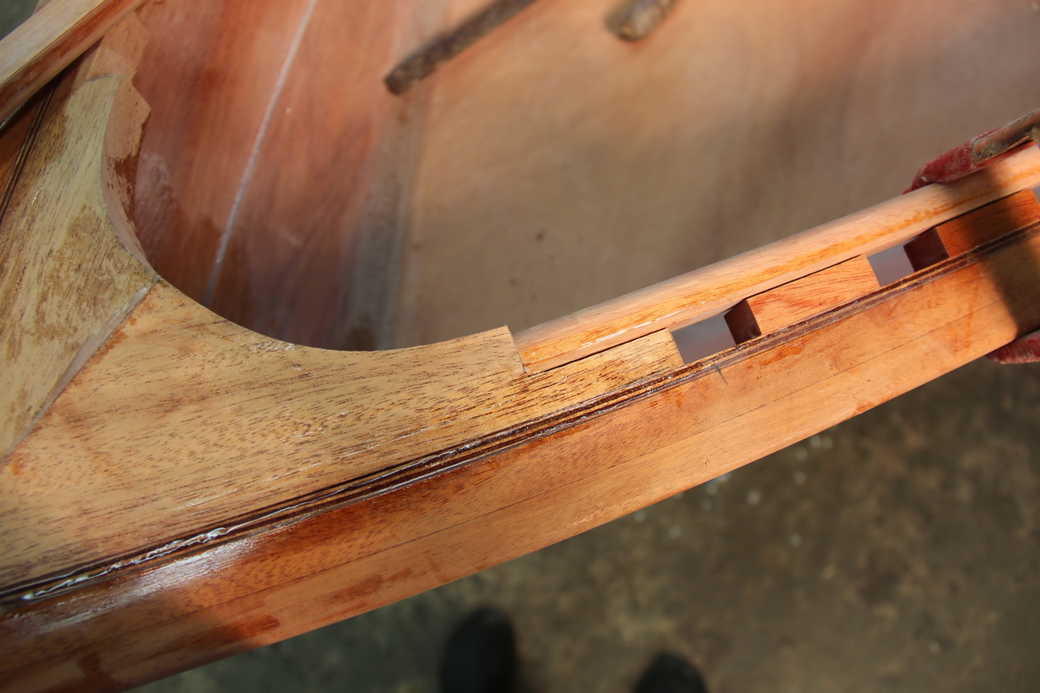
Test the fit of a sample section of inwale and spacer in the bulkhead notches. A saw rasp is useful for making a good fit.
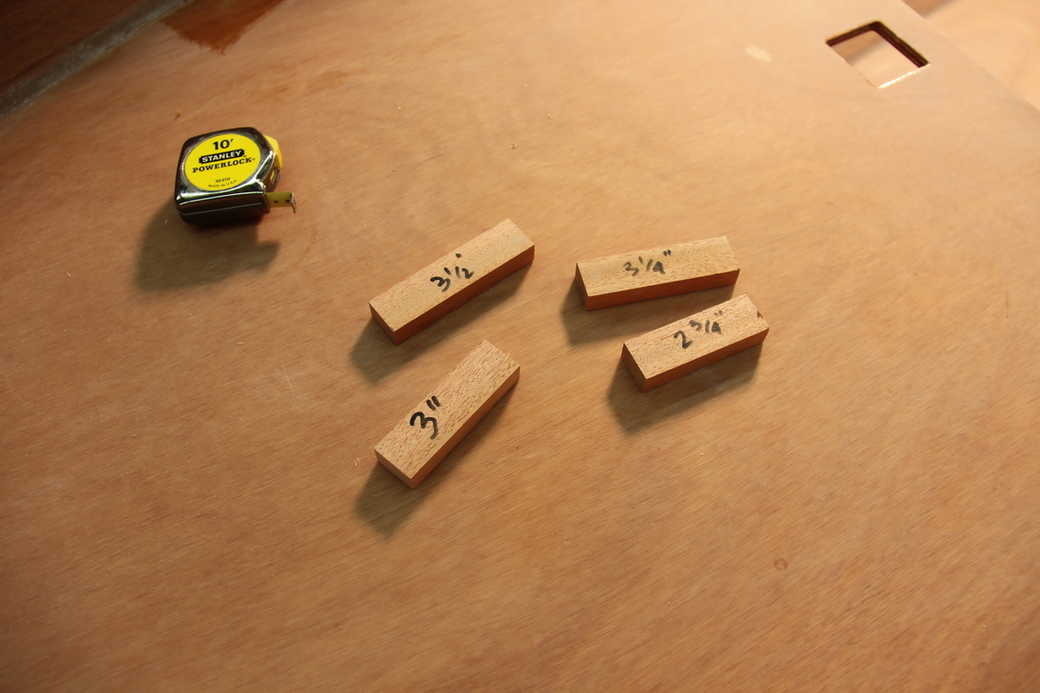
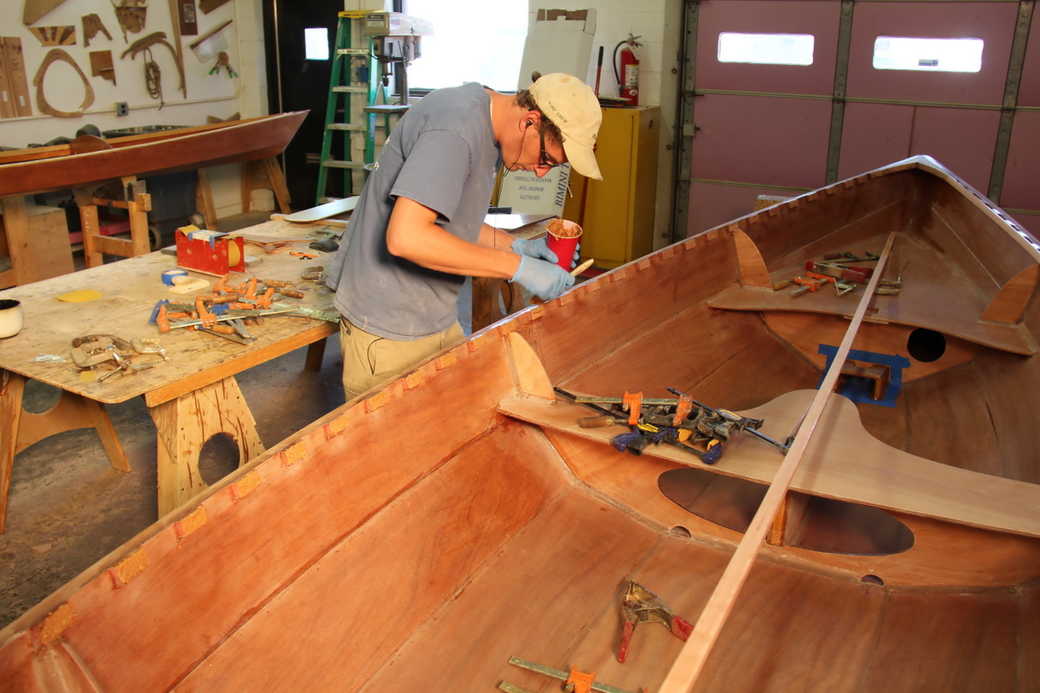
Now it's time to make the inwale spacer blocks. You'll need to decide what length to make the blocks and how much space to leave between them. We wanted spacers to cover each of the Skerry's bulkhead tops, just for aesthetic reasons. To do so and maintain an even spacing of the blocks from bow to stern required much experimentation. We made a few spacer blocks of different lengths and tried them out on the boat until we found a combination of block length and spacing that worked.
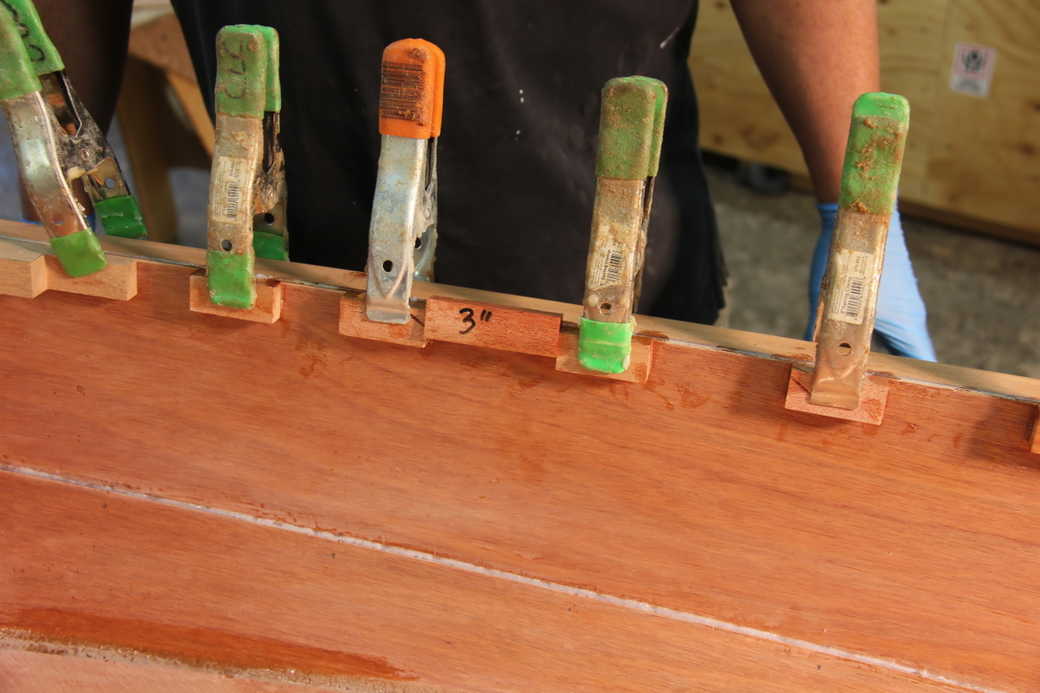
We used spring clamps for a dry run. Ultimately we settled on a block two inches long and a spacing of three inches. It'll be different on every design, so you need to be willing to experiment until you're happy with the look of it.
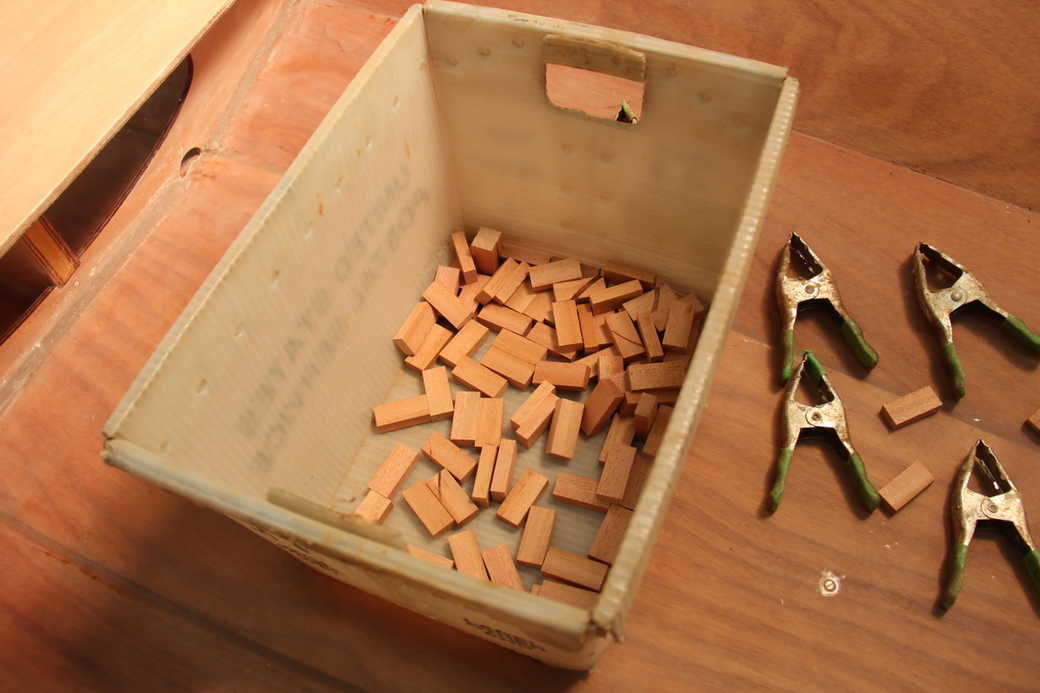
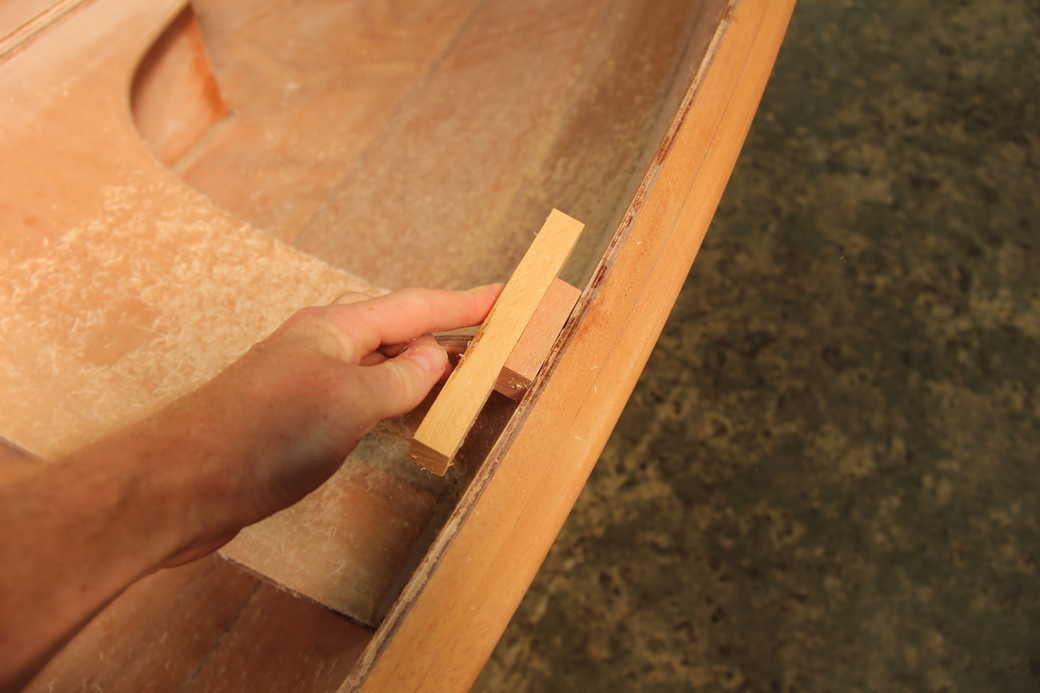
Now you can cut spacer blocks of the right size, ready to glue into the boat.
We recommend doing a full test-fit before starting to glue the blocks in place.
The two-inch block and three-inch spacing wasn't perfect: we had to cheat the block spacing at the ends. You'd probably never notice it in the finished boat.
We are going to glue the spacer blocks to the hull first, then fit the inwales afterwards. It's possible to glue the blocks to the inwale first and then install the whole assembly in the boat, but that requires some fiddly fitting. Gluing the blocks to the hull first is easier and saves time.
Some builders actually mill spaces out of their inwales; in other words, the inwale and spacer blocks are a single piece of wood. This is as tricky as it sounds, requiring much forethought and a clever router jig. That approach leaves no room for error at any stage and is best left to confident cabinetmaker types.

Glove up and brush paste-consistency epoxy on each spacer block.
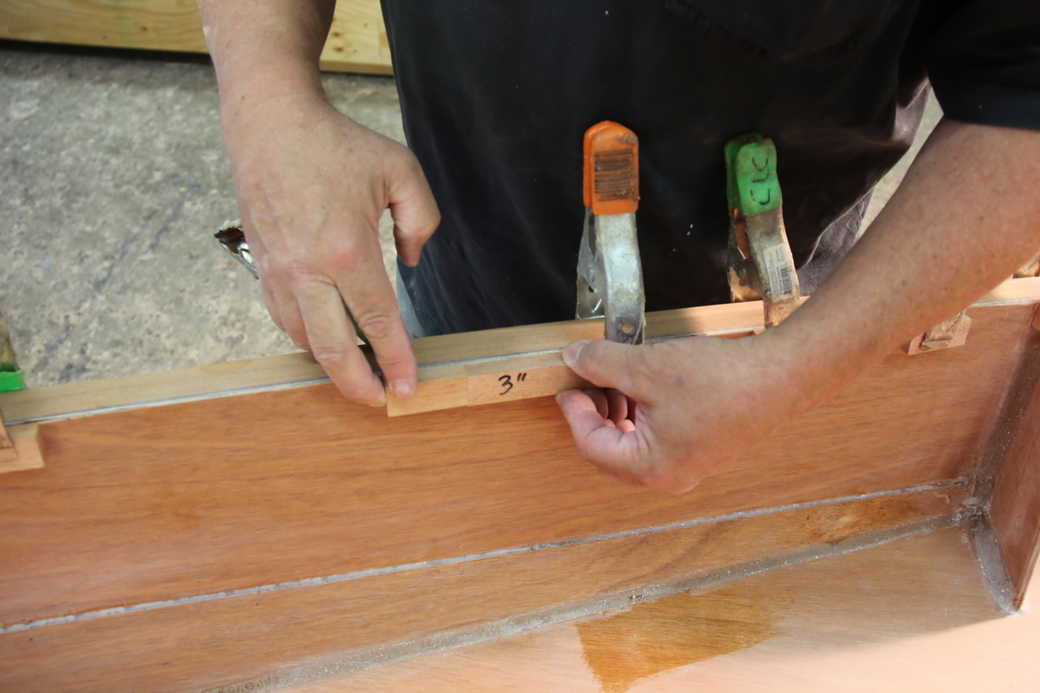
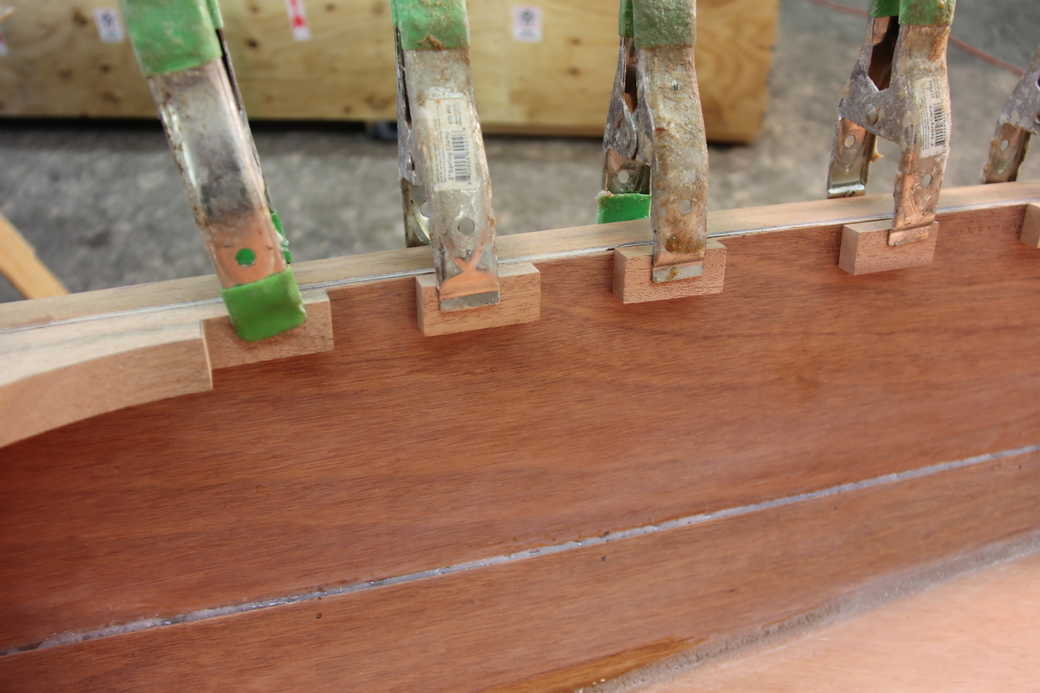
Clamp the blocks in place. Note the three-inch block, which is used to establish the spacing between each two-inch block glued to the hull.
The block is atop the bulkhead as intended.
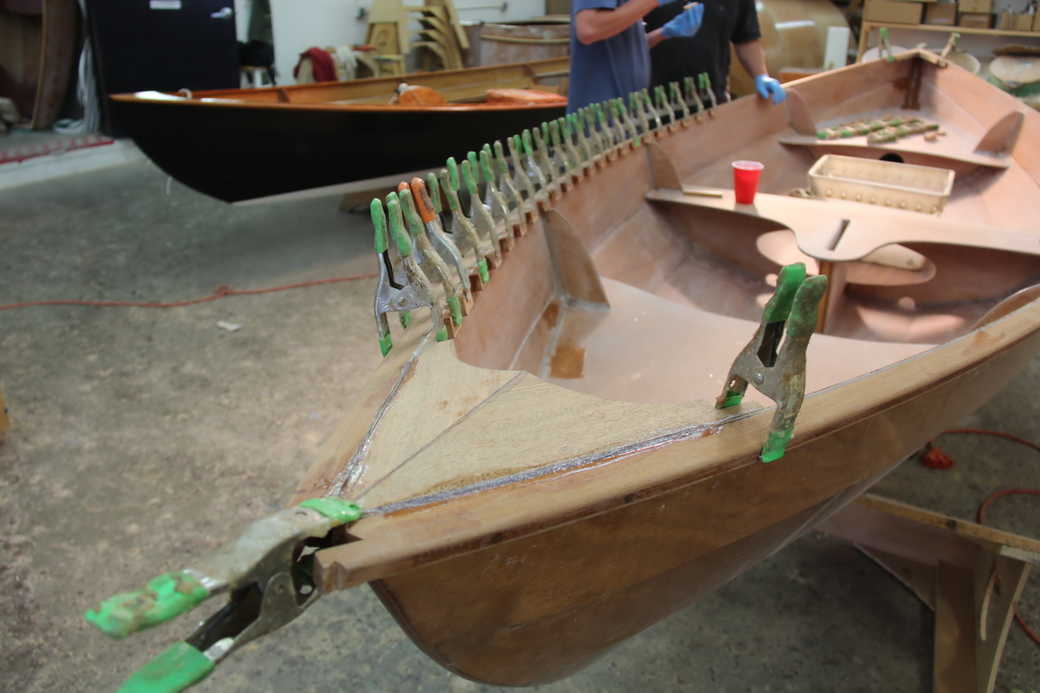
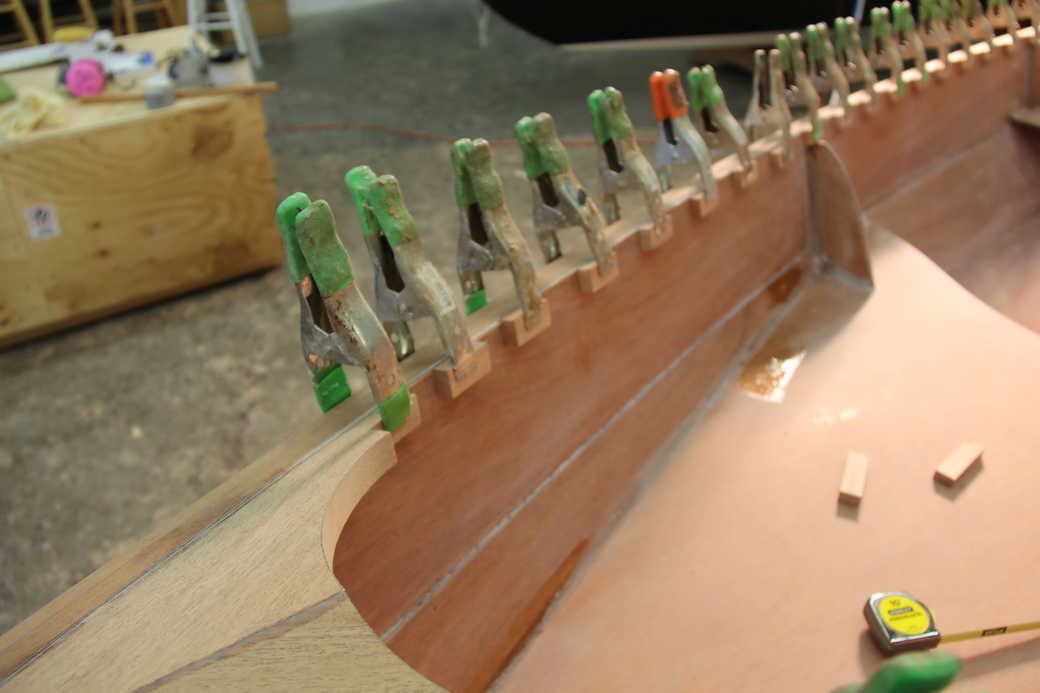
Muster all the spring clamps in the neighbourhood for gluing in all the spacer-blocks. The Skerry will have about 30 blocks per side.
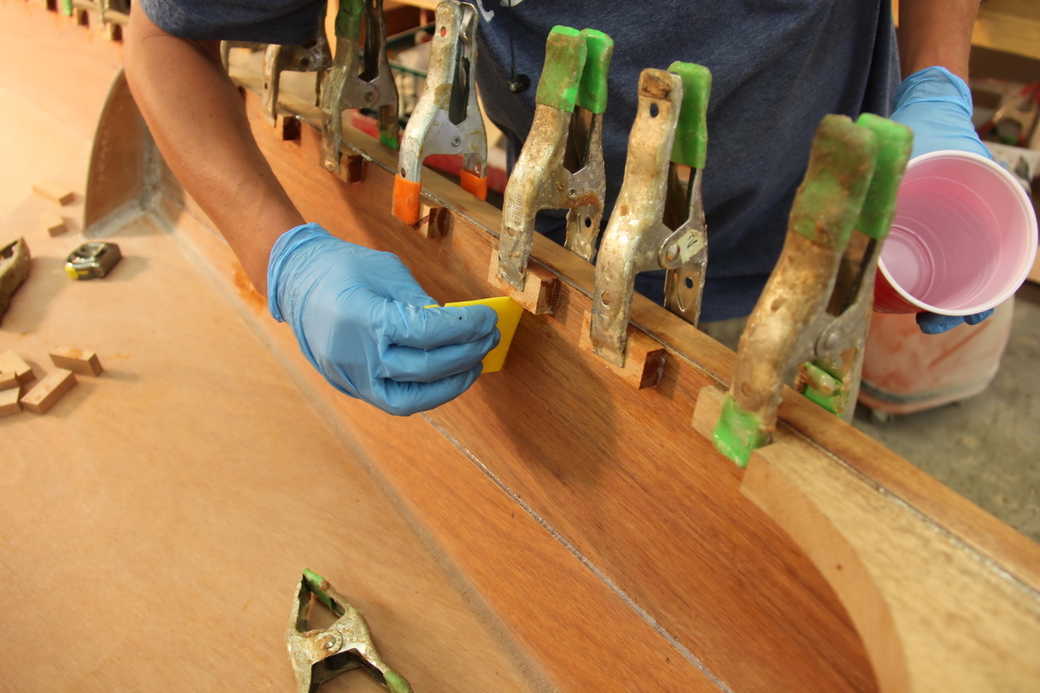
If you aren't slavish in cleaning up the squeezed-out epoxy, you will have an awful mess once it cures.
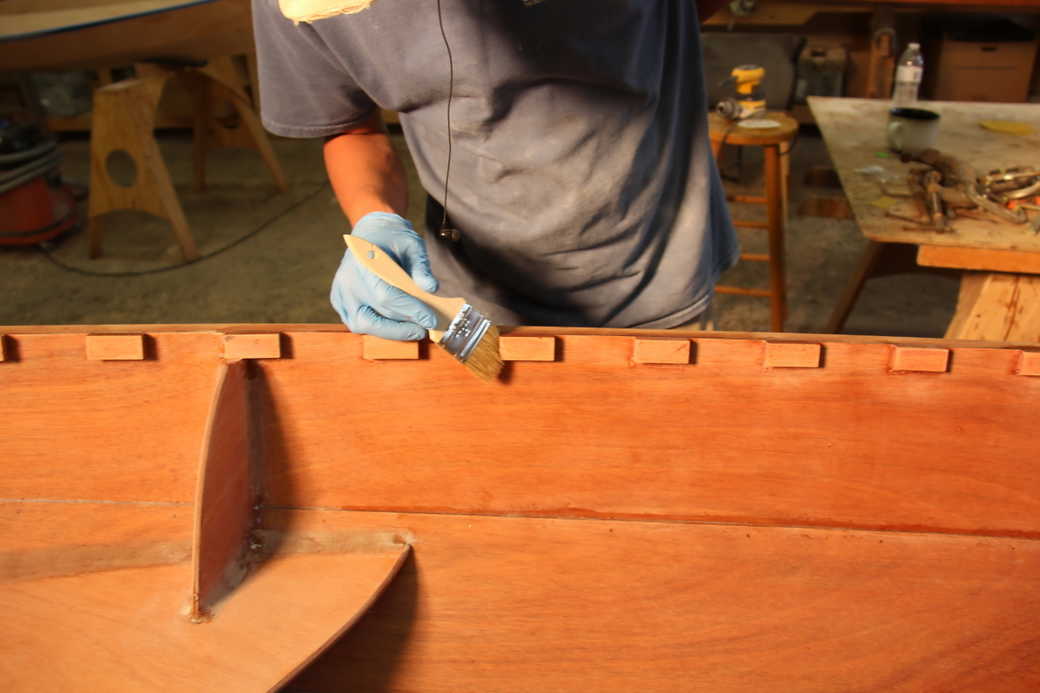
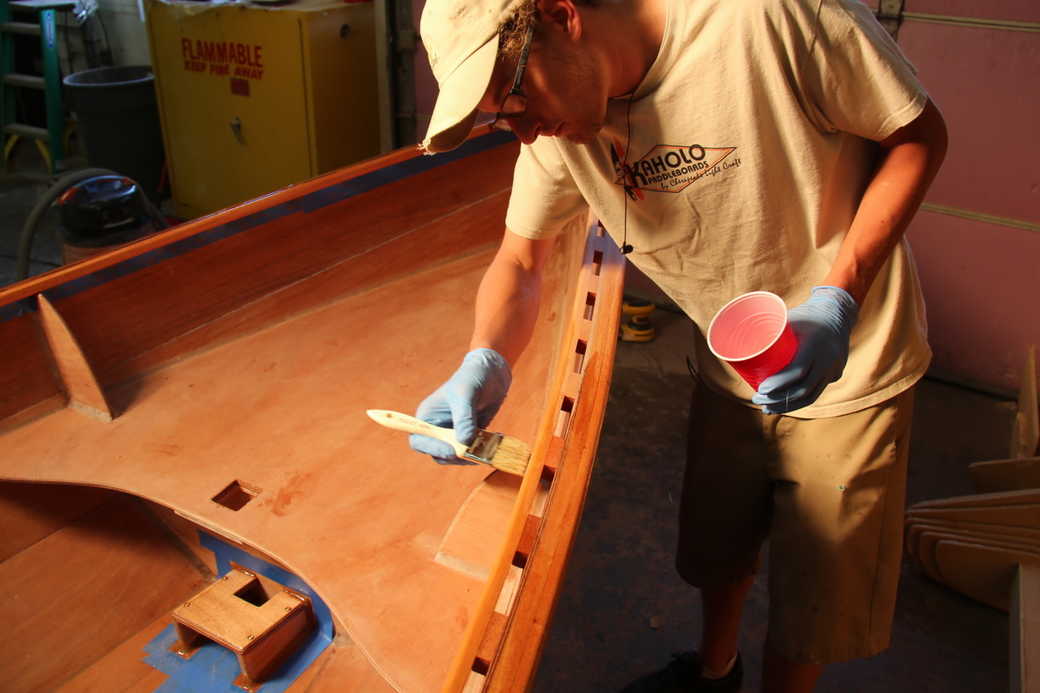
Once the epoxy on the spacer blocks has cured, their ends and undersides need to be sealed with a couple of coats of epoxy. It is much easier to do this now than after the inwales are installed. Note that we don't coat the inboard faces of the blocks, to which the inwales will be glued.

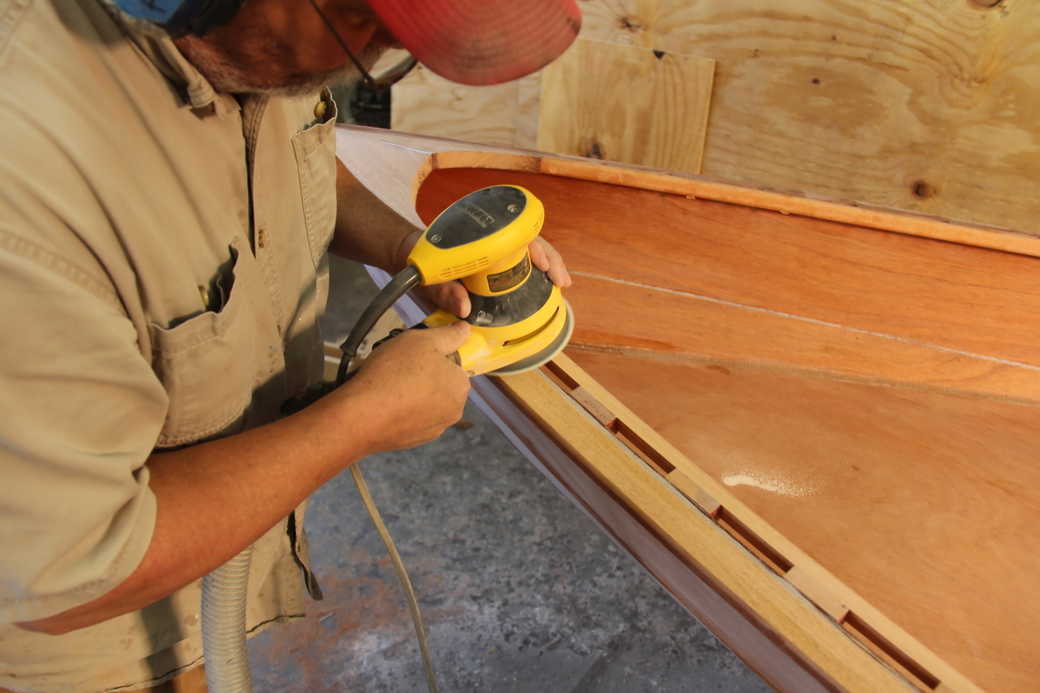
Sand the blocks carefully and patiently, to prepare them for varnishing. Again, it's much easier to do this before the inwales are glued on.
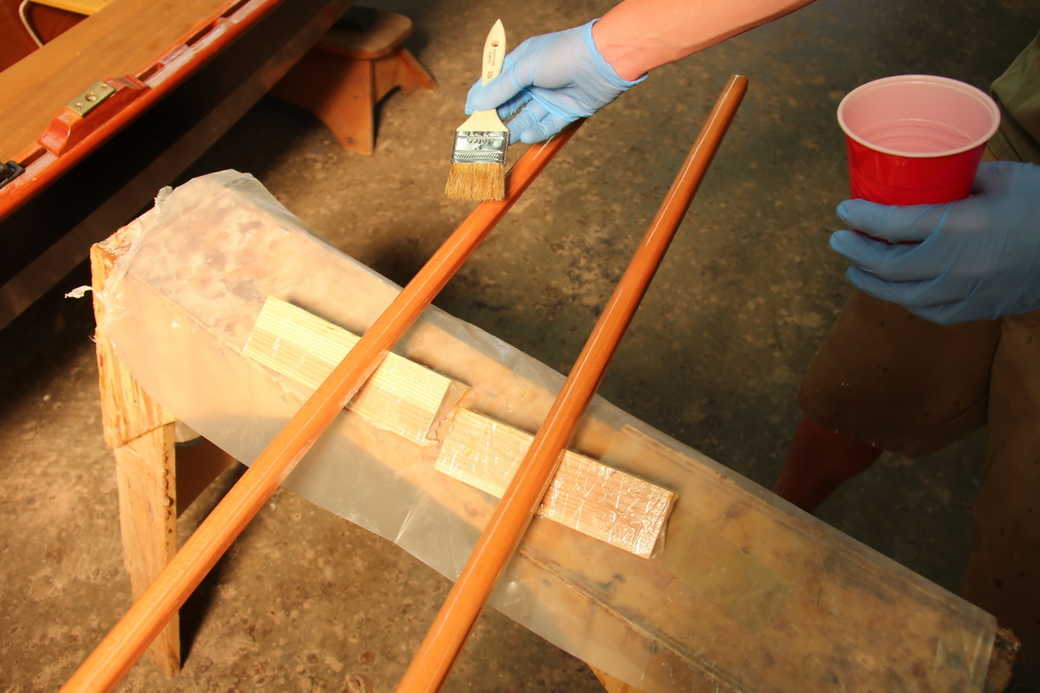
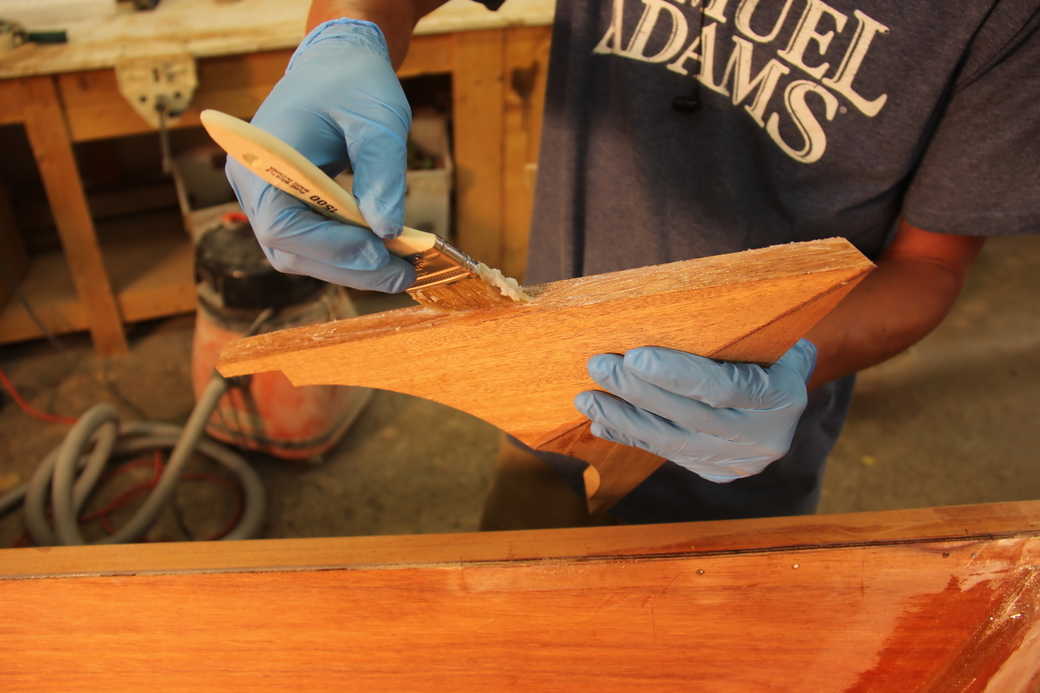
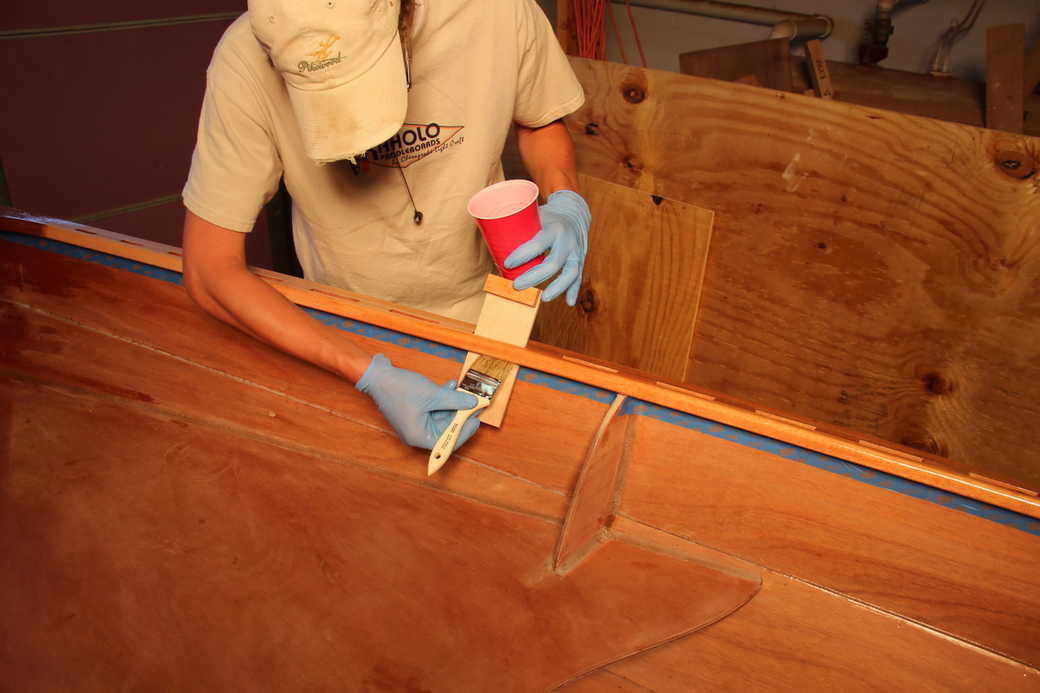
Round over the inside corners of the inwales and apply several coats of epoxy to all four faces. In order to coat all four sides of each rail in one operation, the rails rest on triangular blocks of wood protected with packing tape.
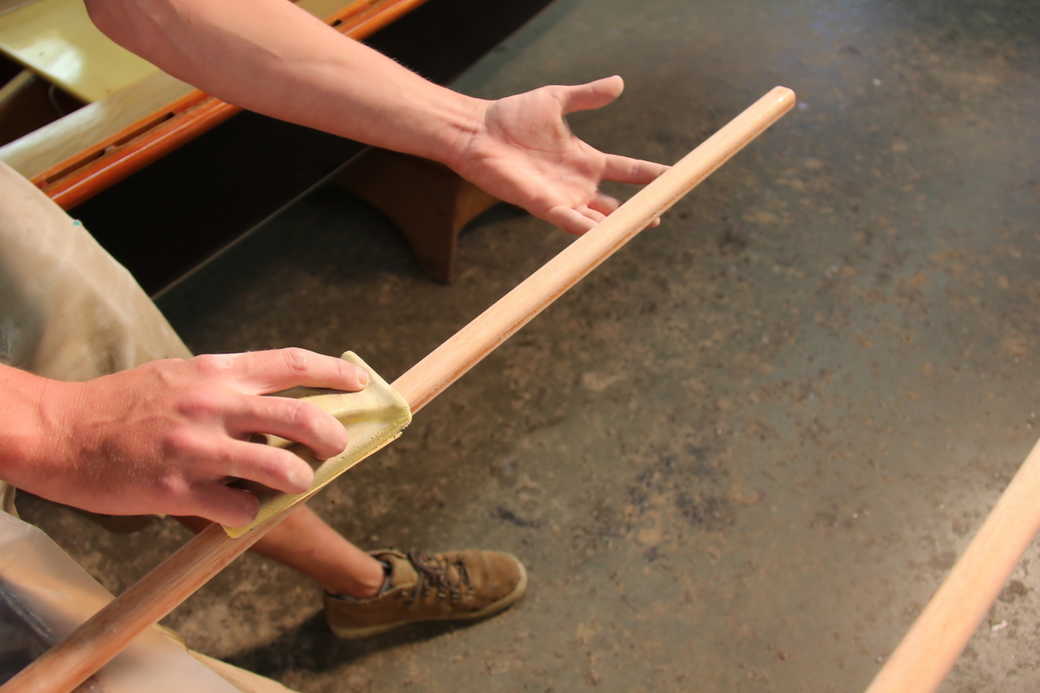
It's best to sand the rails by hand, otherwise it's hard to avoid sanding through the epoxy coating. Sand them to 220-grit, ready for varnishing later.
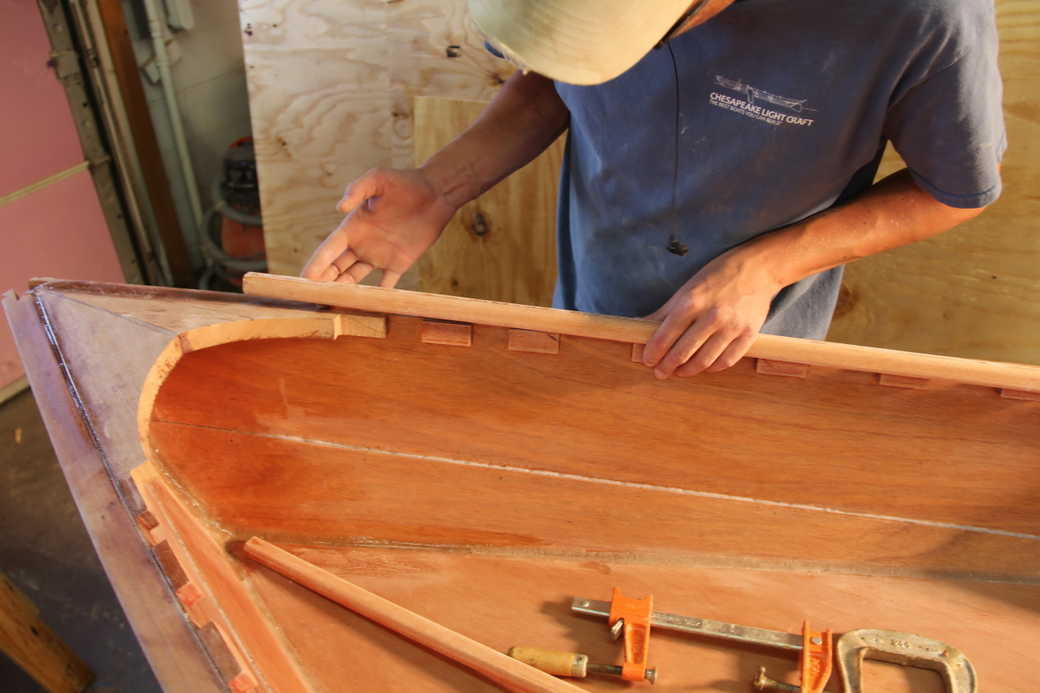
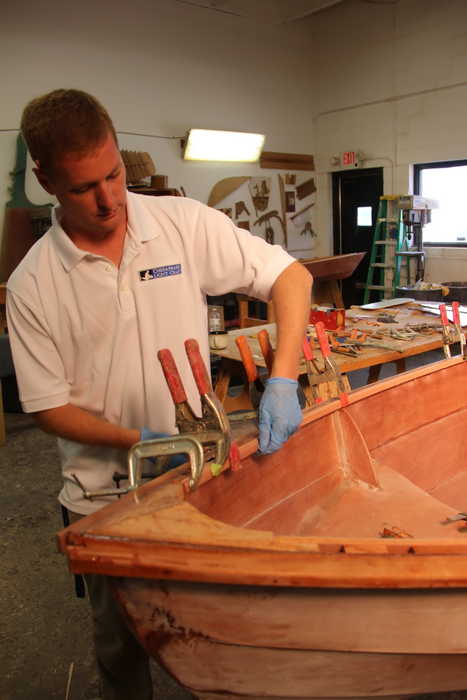
Be very careful when trimming the inwales to length: it's very easy to cut them too short and this is the most common mistake made in the whole process. Take it slowly and remember that you can always take more wood off but you can't put it back on.
Begin by seating the inwale firmly in its notch in the stern breasthook (or quarter knee in transom-sterned boats). Clamp it to the spacer blocks along the length of the boat, making sure it stays tightly in the notch at the stern. You want the inwale in contact with the spacer blocks along the whole length. If the inwale is allowed to take a shortcut somewhere along the curve, you're going to cut it too short and end up with an ugly gap at the terminus in the breasthook.
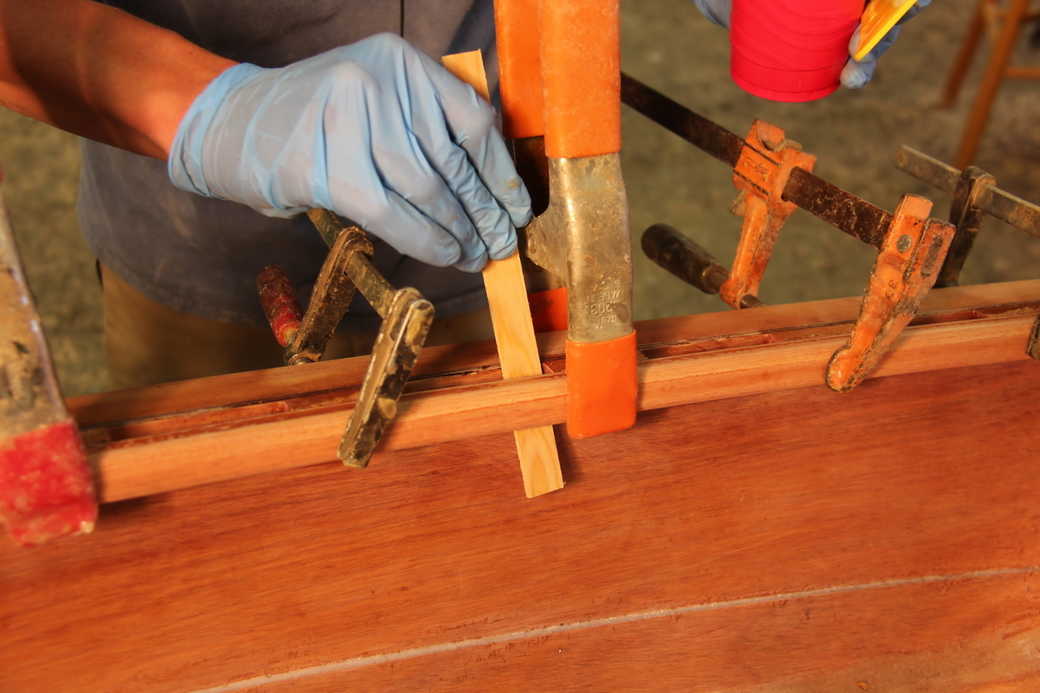
Now to cut the inwale exactly to length.
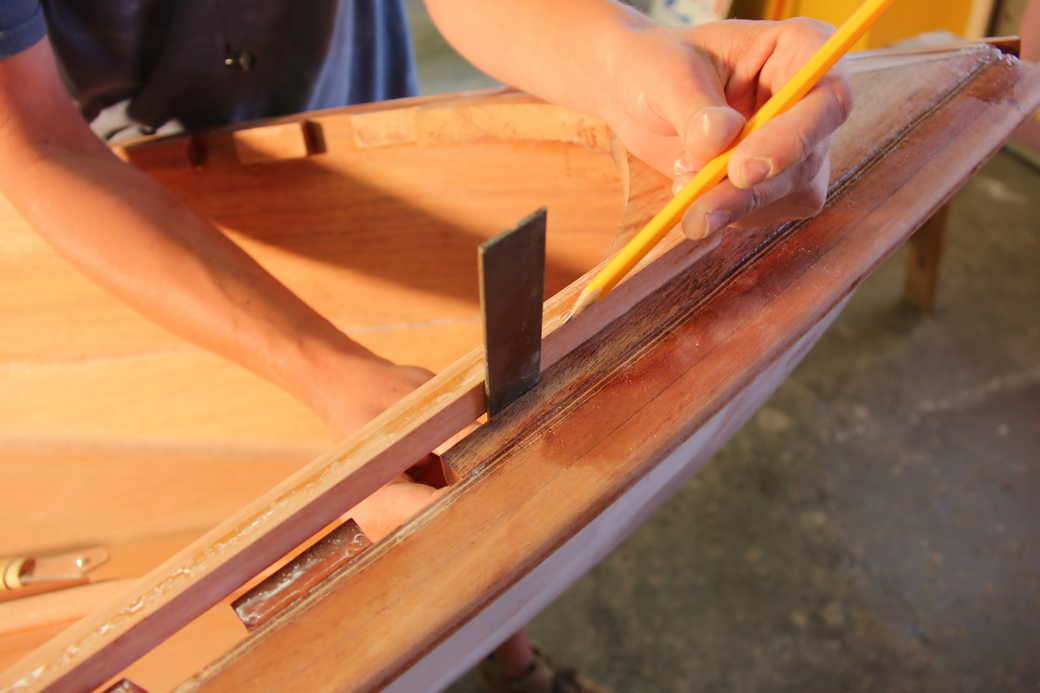
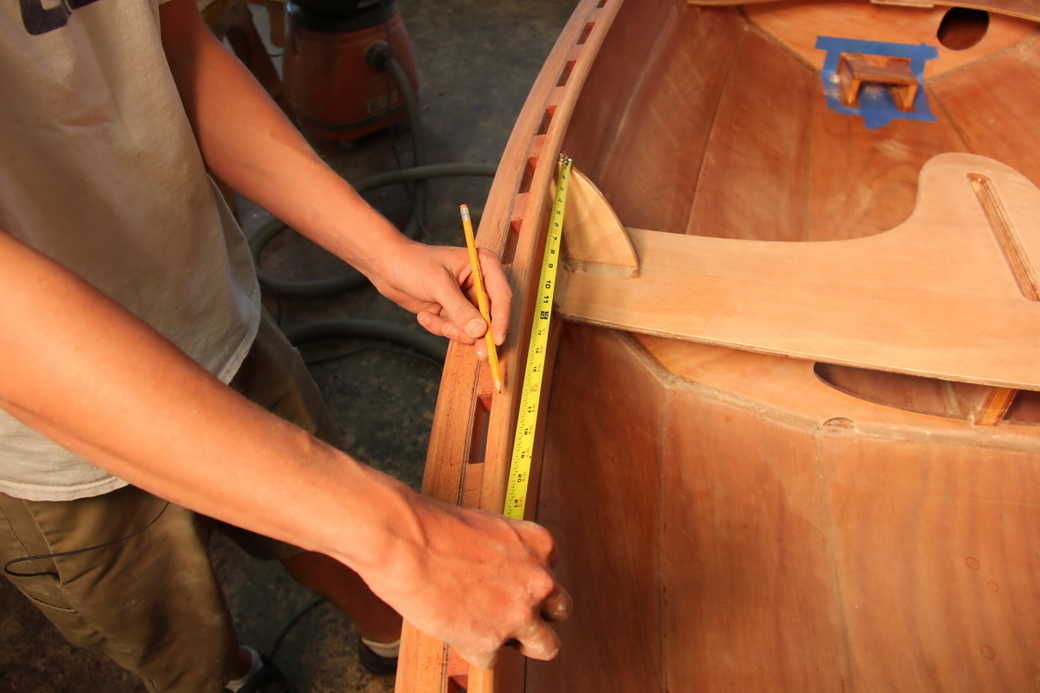
A steel rule is used to mark the rail for cutting.
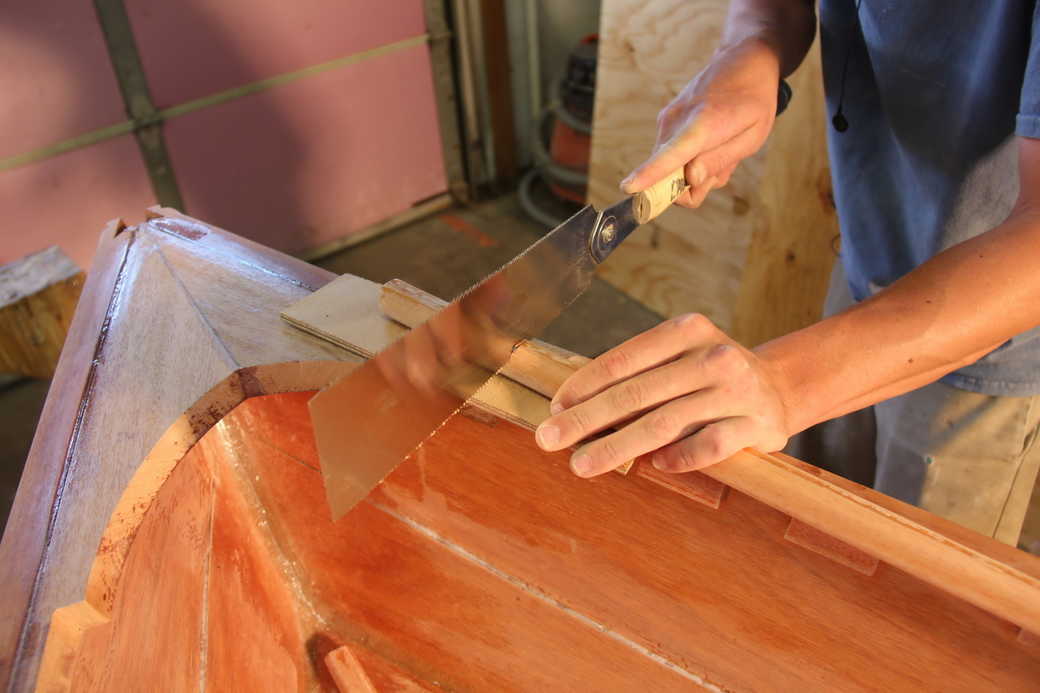
Slip a bit of scrap under the inwale and use a sharp, fine-toothed saw to cut off the excess length.
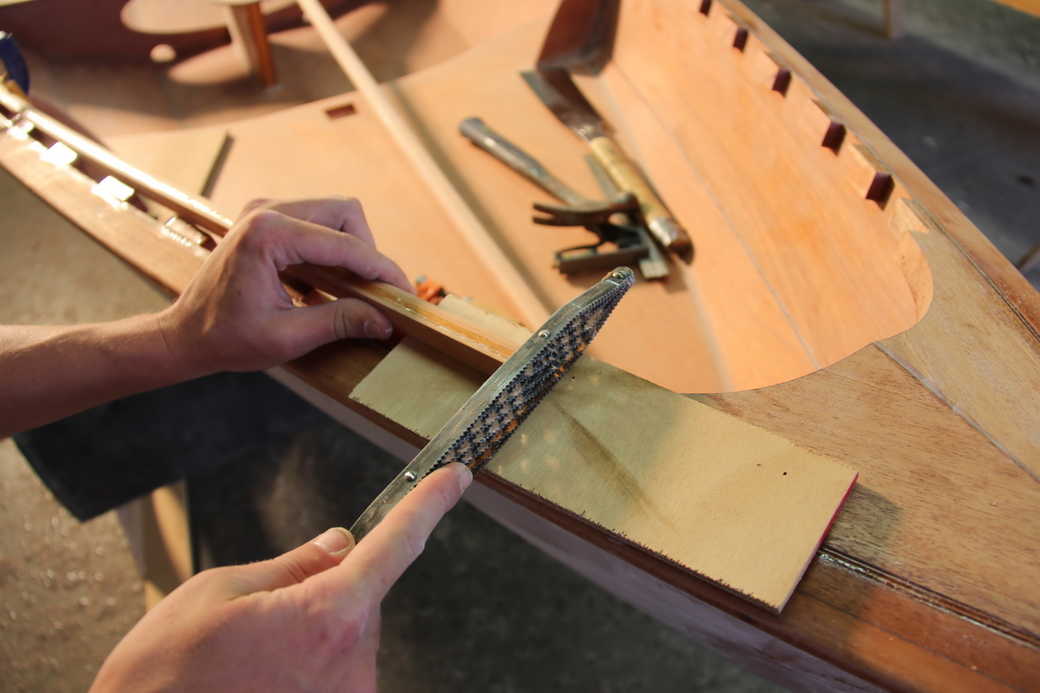
Still a bit too long? Patiently work the inwale down with a rasp and sanding block.
You've nailed it if you need a light tap from a hammer to slot the inwale in place.
A perfect fit in the breasthook!
Remove the inwale and spread epoxy on all the spacer blocks.
It helps to have a second pair of hands to help lever the inwale into place without making too much mess.
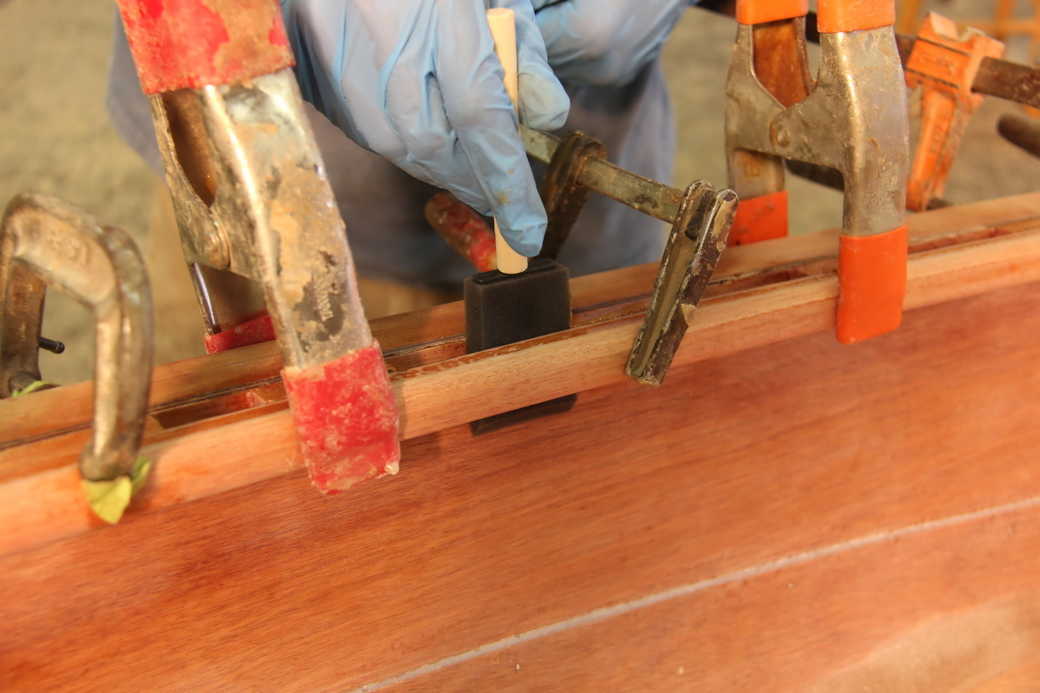
Minimising the glue mess is essential here. Start with a couple of spring clamps to settle the inwale in place.
Watch the alignment! You don't want to glue the inwale in too high or too low in the boat.
You'll need one clamp per spacer block. Note the proper alignment and a bit of squeeze-out. Not too much squeeze-out, though – epoxy likes contact between surfaces, not crushing pressure.
Once again, take great care to clean up the excess epoxy. Some of the epoxy will squeeze out into the spaces between the blocks – you should clean it out before it cures, otherwise chipping it out will not be easy.
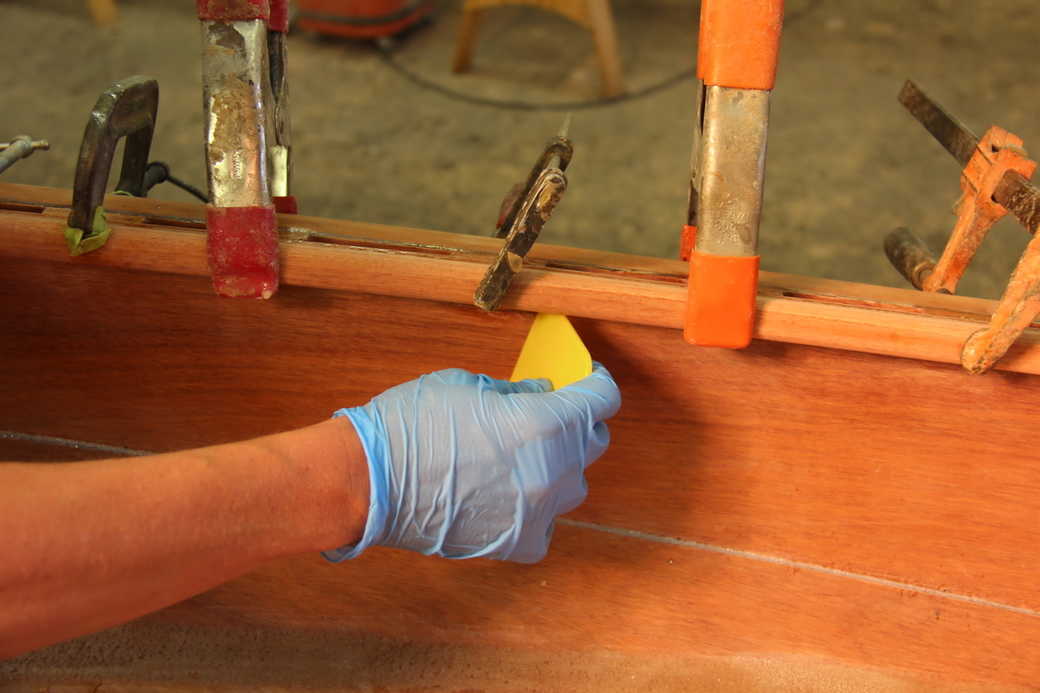
Scraping excess epoxy off the undersides of the rails.
Finally, a disposable foam brush can be used to clean up the last traces of epoxy from inside the spaces.
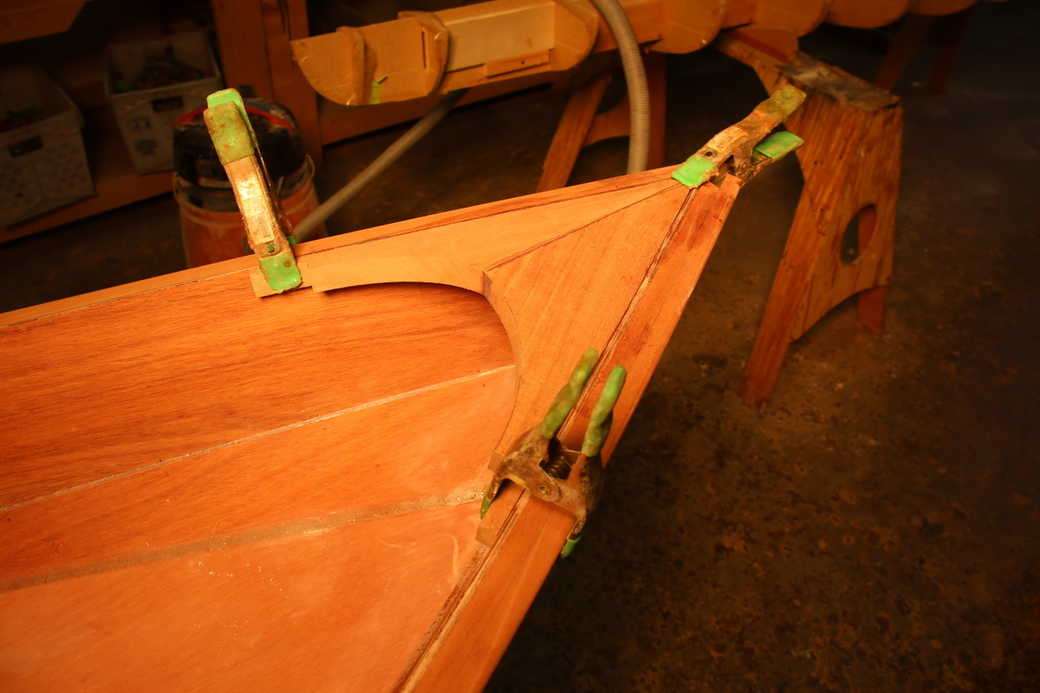
The port side has cured and we've installed the starboard inwale. If you look closely, you can see a lead ingot on the port side of the centre thwart. It's there to keep the weight of the clamps from capsizing the boat to starboard.
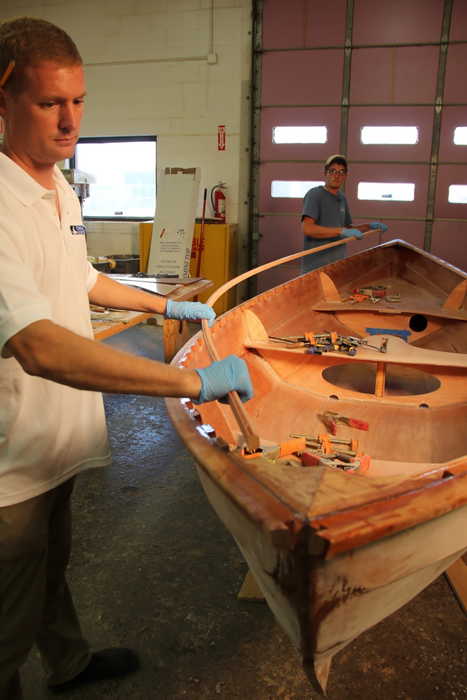
With the epoxy cured, we can do our final shaping and cleanup. Using the nearest convenient radius (a roll of tape), the outwales are shaped at the bow and stern.
A 5-inch random orbital sander with 120-grit is used to flatten the tops of the rails. Yes, you'll sand off some of the epoxy you applied to the inwales in earlier steps, but not on the impossible-to-reach inboard and underside faces.
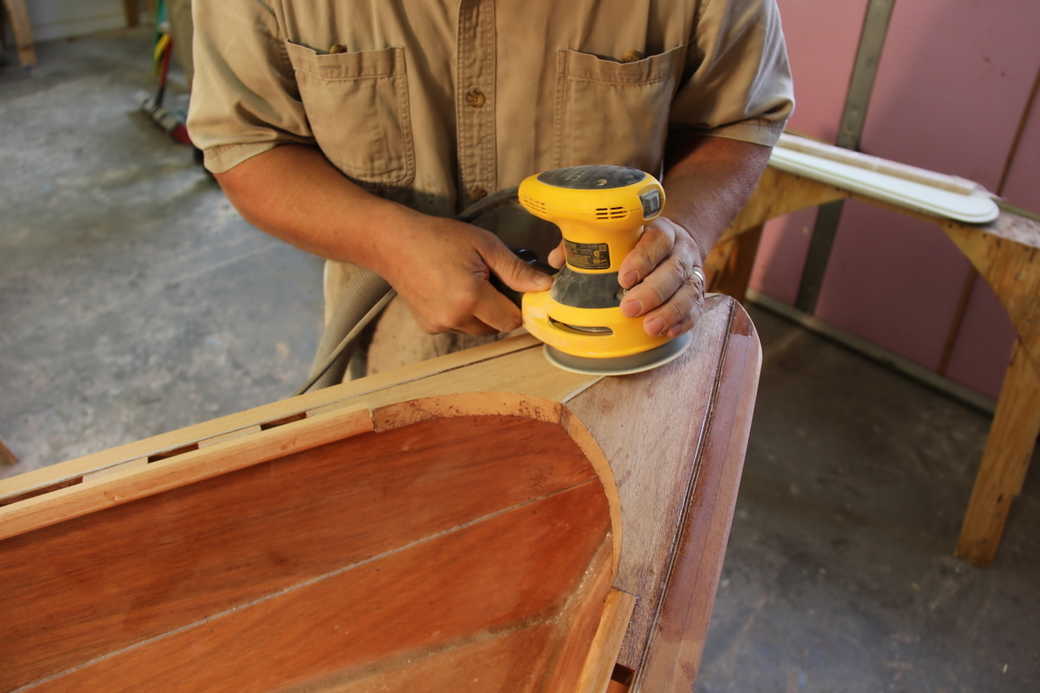
Smoothing the breasthook at the bow.
The round-over we gave the inwales was continued around the inside perimeter of the breasthook.
Patient sanding continues until the rails gleam.
Out comes the epoxy for another couple of coats on the tops of the inwales and outwales where we sanded through.
Neatness cannot be over-emphasised at this stage. Andrew made himself this little masking device from a scrap of wood to protect the hull from excess epoxy. Note the masking tape, which also keeps excess epoxy off the hull interior. The interior was finish-sanded to 220-grit, ready for varnish, before the rails were installed.
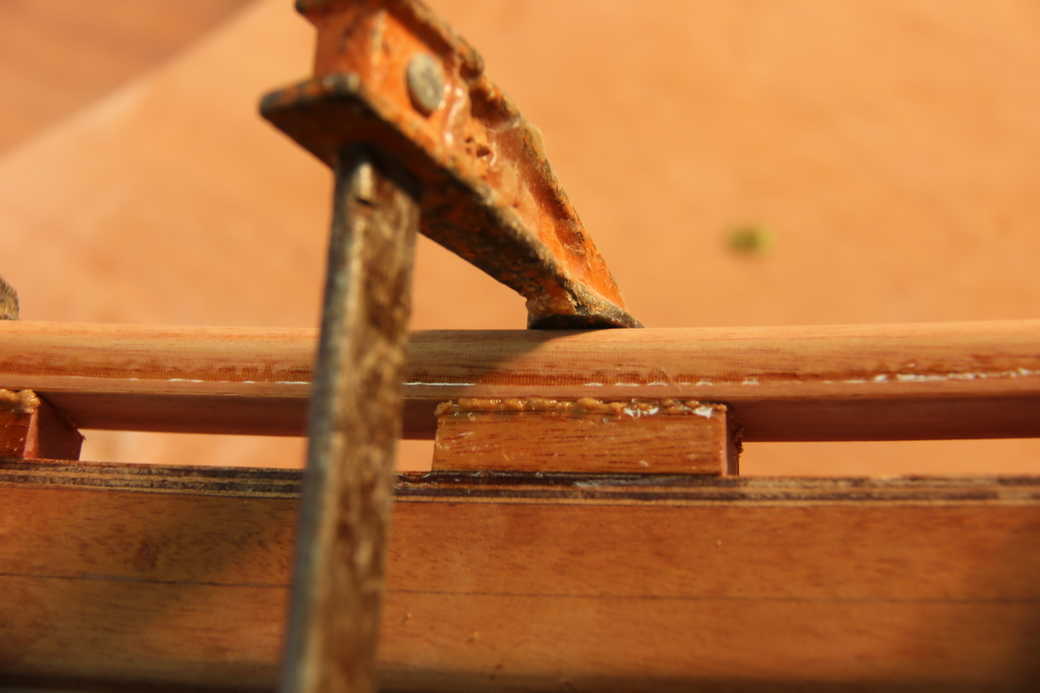
Time to install our rowlock mounting blocks. The inwale-and-outwale combination is too wide for the side-mount rowlock sockets to work. We'll need top-mount rowlock sockets and we'll need to give them some elevation so that the oar will clear the rails on each stroke. These mounting blocks are what worked for our Skerry:
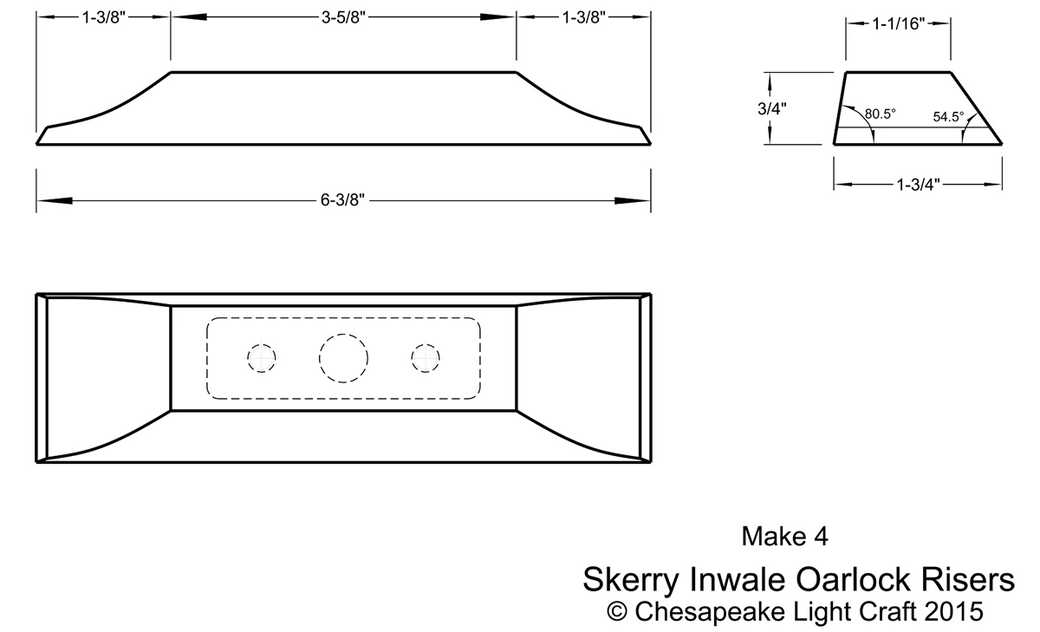
The mounting blocks also serve to reinforce the inwales: we're going to have to drill a large hole through the inwales for the rowlock pin. We glue on the mounting blocks first, to avoid kinking the inwale when we drill it.
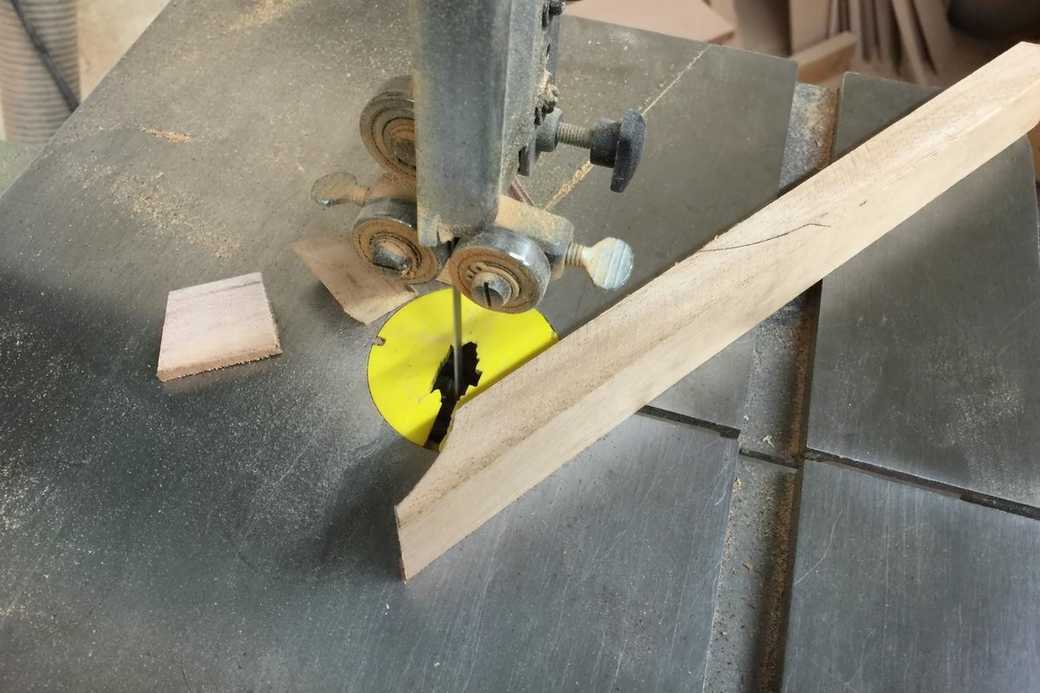
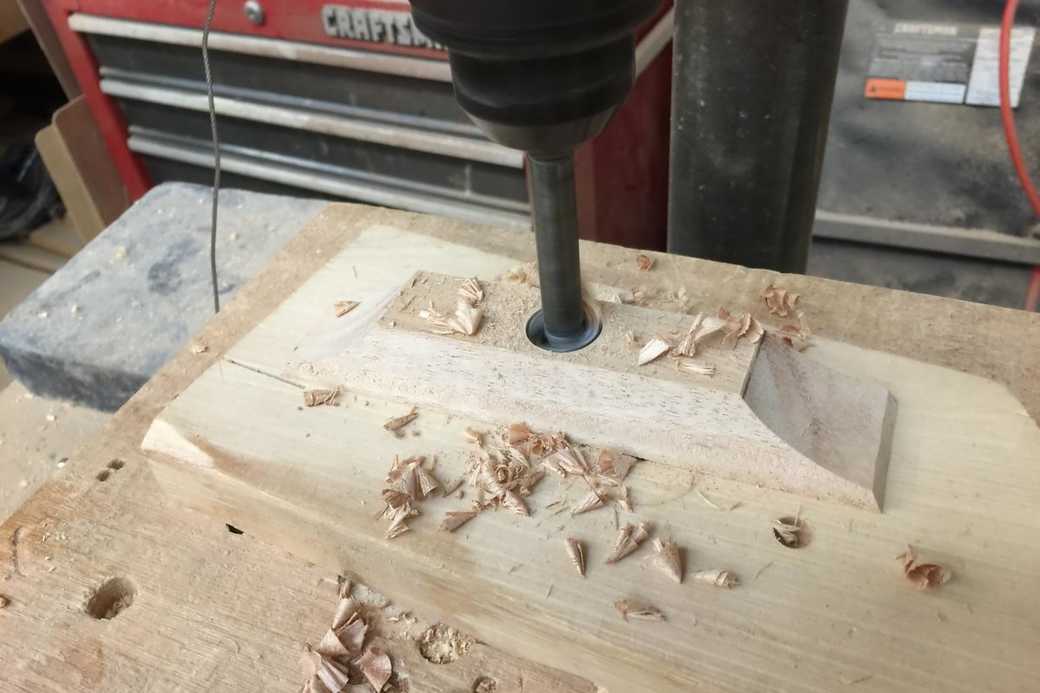
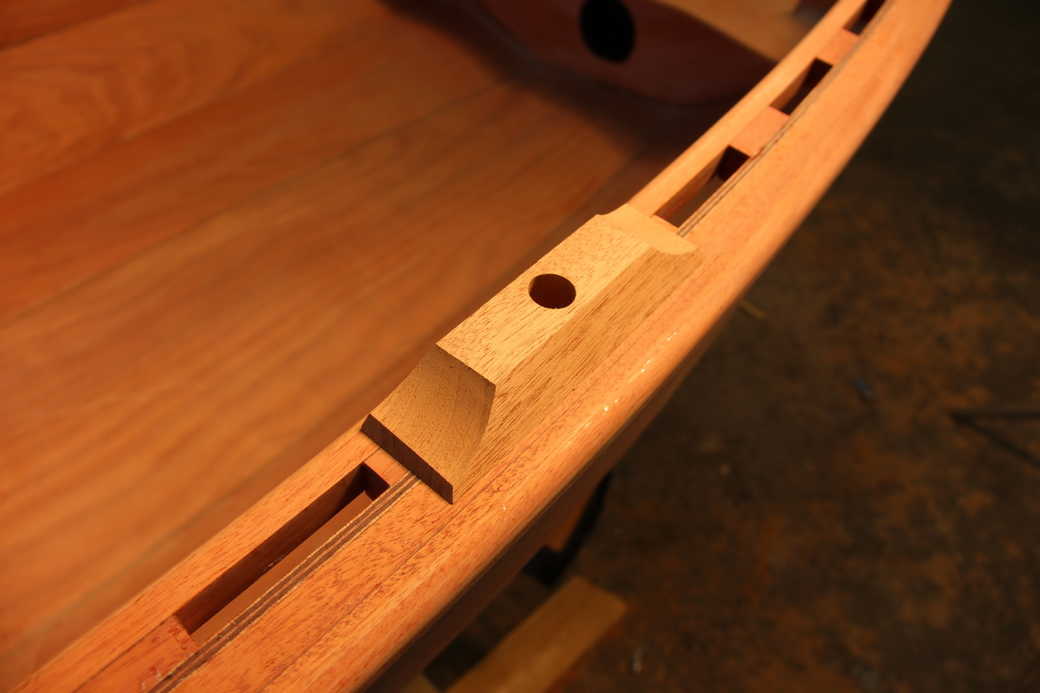
We cut the mounting blocks, drilled the hole for the socket and tested the fit on the boat. The carefully-designed angles in the sides of the mounting blocks position the rowlock socket so that the hole for the rowlock pin passes inboard of the plywood hull side.
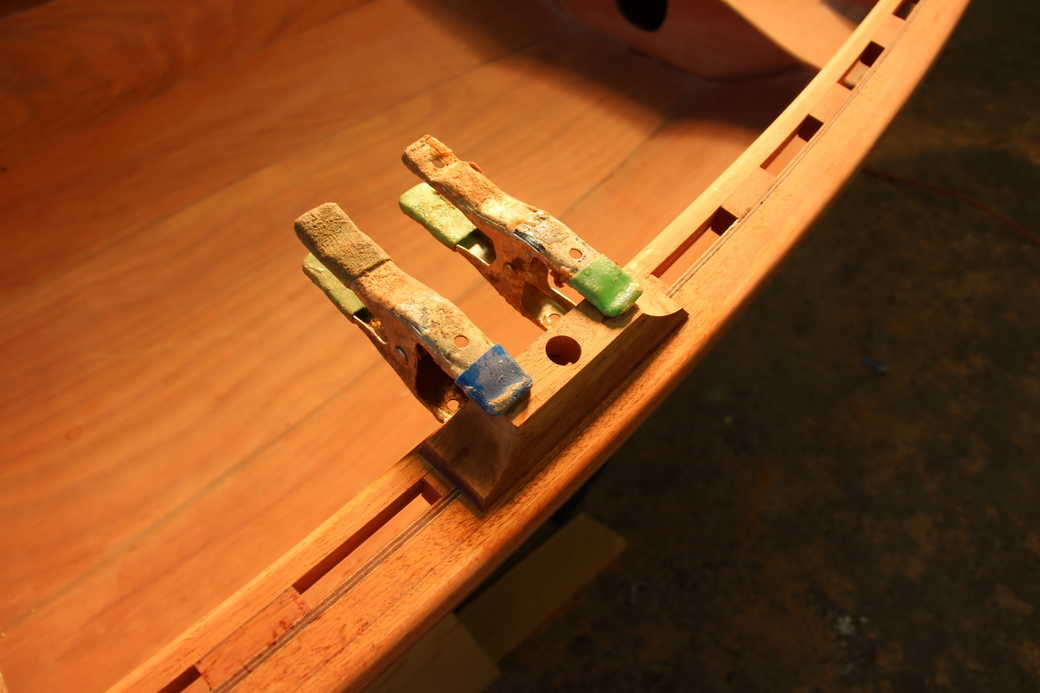
The mounting blocks are epoxied in place. After the epoxy cures, we'll finish drilling the hole the rest of the way.
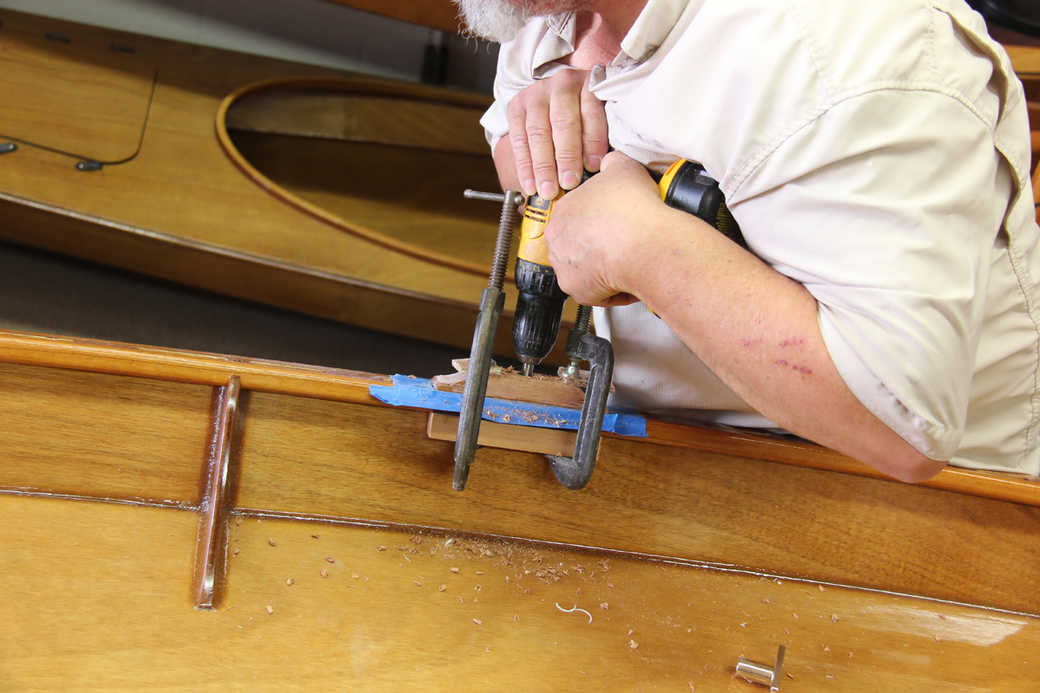
Drilling the hole through the inwales for the top-mount rowlock sockets. This is a Southwester Dory. Note the scrap of wood clamped tightly to the underside of the rails to prevent tear-out as the drill bit emerges. If you've oriented the rowlock risers correctly, the drill shouldn't hit the plywood hull. Don't forget to seal the inside of the holes with a dab of epoxy.
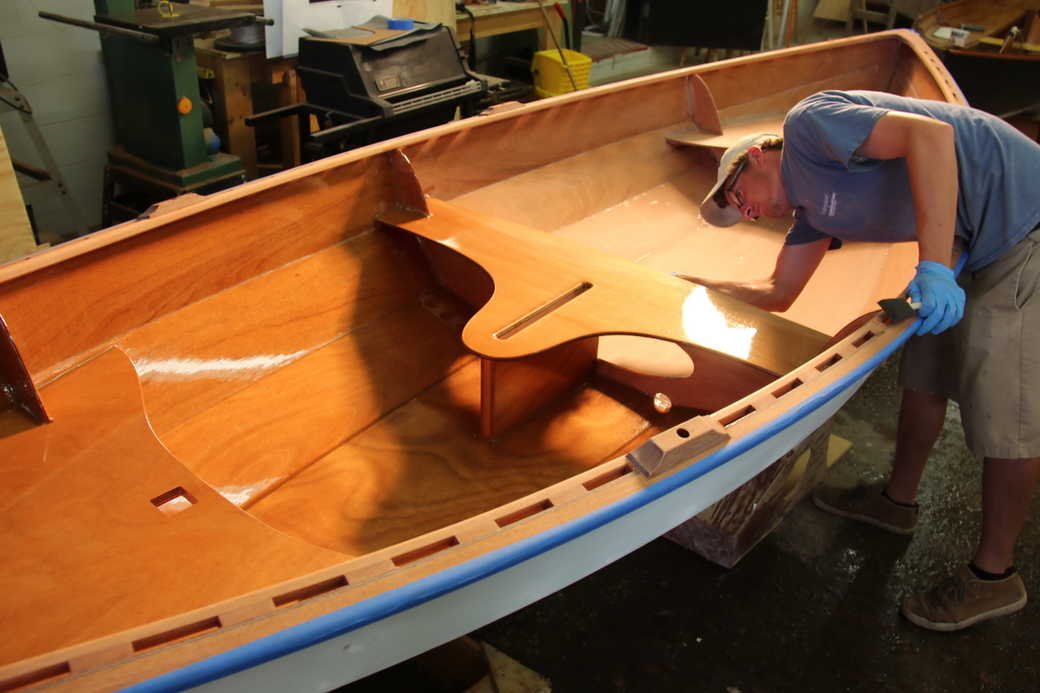
When varnishing, start with the interior of the hull, then varnish the rails, so that the rails are dry while you are leaning over them to reach the interior.
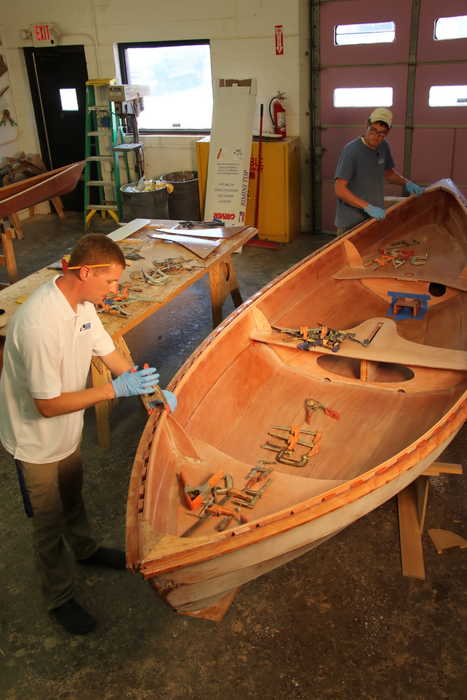
And that's it. Here's a Southwester Dory with broken inwales. It's a lot of work, but the patient builder is rewarded with detailing worthy of a yacht.
Pre-cut inwale kits, including breasthooks and quarter knees as necessary, are available for many of our small boats.