Installing Kayak Rubrails
Installing rubrails on a kayak with sheerclamps
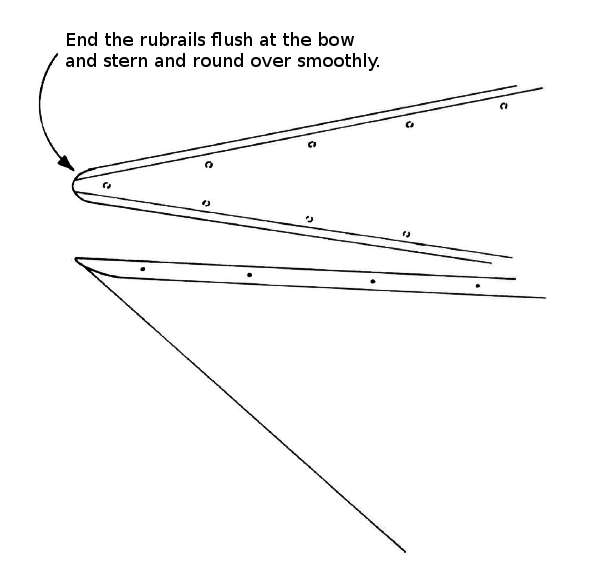
First, join the rubrail sections together with scarf joints to the full length of your boat. Once the epoxy has cured, trim the rubrails to length.
Fasten them to the side of the hull at the sheerline with epoxy and ¾″ brass brads spaced four inches apart. For boats without sheerclamps, simply glue the rubrails on with epoxy. It is very important that the top of the rubrail is flush with the top of the deck. If the rubrails are installed a bit high, you can plane or sand them to the level of the deck. If the rubrails are too low, you will need to plane the deck – avoid this at all costs!
Sand or plane the ends of the rubrails into a smoothly rounded shape at the bow and stern.
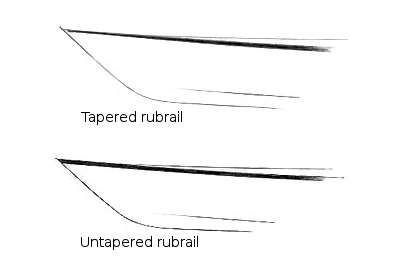
Tapered rubrails give a kayak a more elegant appearance
Rubrails can look a little bulky on the slim hulls of kayaks, so we recommend tapering them at the bow and stern with a block plane. As it rises to the bow, the taper in the rubrail mimics the sharpening of the bow. It only takes a few moments with a hand plane, but the result is a much more refined appearance.